Have you ever wondered how a hard plastic tool gets a soft, grippy finish without extra assembly? Many industrial applications require distinct core and surface properties, which are unachievable with a single material. Overmolding solves this.
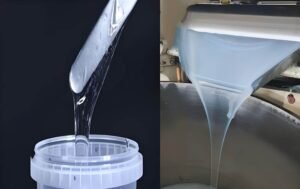
Overmolding is a two-shot injection molding process where a thermoplastic elastomer (TPE) or liquid silicone rubber (LSR) is molded over a rigid plastic substrate (typically ABS, PC, or nylon) to create a single multi-material component. You can get combined function—grip, sealing, vibration damping, and better looks—without extra snaps or adhesives.
But how does it work, and how are materials combined flexibly? This blog covers overmolding basics, the plastic overmolding process, and key injection molding tips.
What Is Overmolding?
Overmolding is a specialized injection molding process where a pre-molded plastic part is placed into a second mold, and another material is molded over it. Unlike standard injection molding, overmolding creates multi-material parts with distinct properties in a single process.
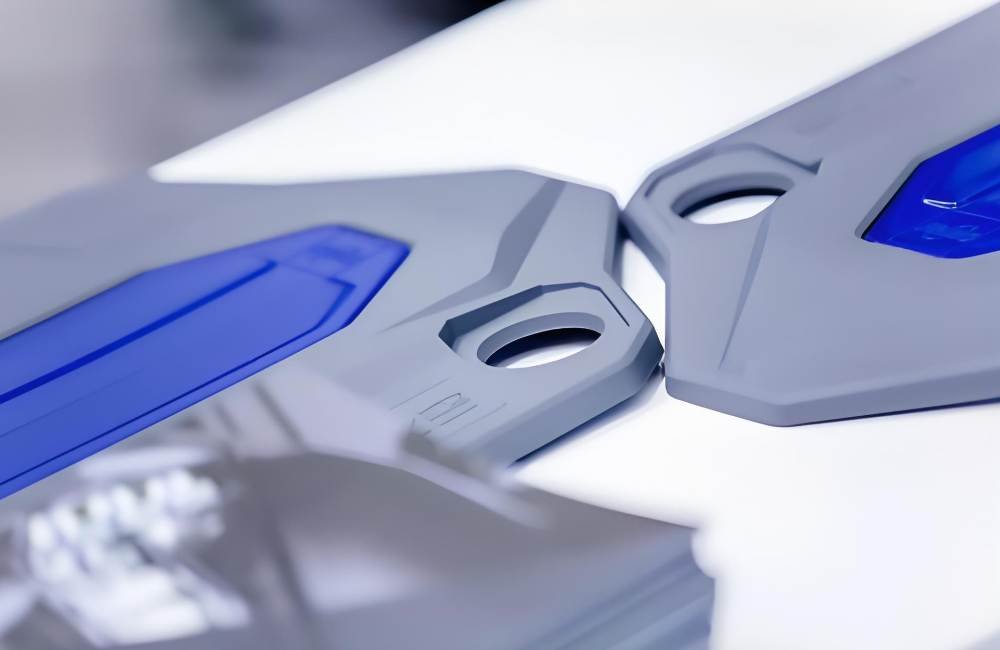
The substrate is the base layer, usually an injection molded plastic core, which provides strength and structural features. The overmold layer is the second shot that becomes the performance surface. It adds usable surface qualities: soft touch, improved grip, and sealed edges where needed. Together they form one finished component without extra assembly.
Core Technical Distinction:
- Overmolding: Plastic-over-plastic bonding (TPE over ABS, silicone over PC)
- Insert Molding: Plastic-over-metal encapsulation (see detailed comparison in our dedicated guide)
Why Overmolding Is Used?
Designers use this method to add grip, create water-resistant seals, damp vibration, improve comfort, or upgrade cosmetics. It’s commonly used for handles and touchpoints because it places soft features only where the user touches the part.That single-piece result can reduce assemblies, leak paths, and BOM complexity across many industries and applications.
Advantages of Overmolding
- Enhanced material flexibility
Overmolding enables the combination of multiple materials in a single plastic part, allowing for varied characteristics such as soft-touch grips, vibrant colors, or textured finishes. This enhances both functionality and aesthetic appeal.
- Eliminates the Need for Adhesives
By bonding materials directly during molding, overmolding removes the requirement for glue or secondary assembly and the chemical bonding can achieve ≥5 N/cm peel strength. This not only strengthens part durability but also reduces production costs.
- Integrated Sealing Features
Overmolding can embed soft sealing elements (such as gaskets) directly into parts, improving waterproofing and dust resistance. For instance, electronic enclosures can achieve IP67/IP68 ratings protection without separate O-rings, ensuring a more economical and reliable seal.
- Vibration Damping
TPE overmolding significantly improves vibration control by absorbing and dissipating energy, reducing vibration transmission by 40–60% compared to rigid plastics. This enhances user comfort, minimizes noise, and improves the durability and performance of components in demanding applications.
- BOM Consolidation
By integrating multiple functions into a single overmolded part, TPE overmolding enables effective bill of materials (BOM) consolidation, reducing assembly steps by 30–50% at production volumes above 10,000 units. This leads to lower labor costs, simplified assembly processes, and improved overall production efficiency.
Disadvantages of Overmolding
- Increased Process Complexity
Overmolding requires either multiple molding operations or specialized dual-shot injection systems, leading to longer production cycles and higher costs compared to single-material molding. However, it remains more efficient than manufacturing and assembling separate components, making it the preferred choice for integrated multi-material parts.
- Tooling Cost
Two-shot injection molding requires specialized molds with rotating cores, indexing mechanisms, or dual injection capabilities, making the tooling significantly more complex than standard single-shot molds. As a result, two-shot molds typically cost 1.5–2 times more than equivalent single-shot tooling ($25k-$75k typical range).
- Material Compatibility
Successful overmolding is limited to specific polymer pairs. Key to this is material compatibility, particularly a melt temperature differential of ≤30°C (ideally with the first-shot material having a higher melt point to avoid substrate deformation during the second injection).
- Cycle Time
Due to the need for sequential injections, partial cooling of the first shot before the second, and precise temperature control to achieve proper bonding, cycle times in two-shot molding are typically 15–30% longer than comparable single-shot processes.
How Does Overmolding Work?
In practice, manufacturers run a two-step workflow: mold the rigid core, then inject a softer or different plastic over it in a second shot to create one finished piece often called a two-shot sequence.
Step 1: Substrate Injection
The rigid substrate is molded first using standard injection parameters:
Melt Temperature: 220-280°C (ABS/PC), 240-300°C (Nylon)
Mold Temperature: 60-80°C (higher than standard to prepare for chemical bonding)
Injection Pressure: 80-150 MPa depending on wall thickness
Step 2: Overmold Injection
The substrate is transferred to the second mold station via rotary platen or robotic transfer:
Substrate Preheating: Maintained at 60-100°C to enhance chemical bonding
Melt Temperature: 180-240°C (TPE), 150-200°C (LSR)
Critical Constraint: Overmold melt temp must be ≤30°C below substrate heat deflection temperature to prevent substrate deformation
Bonding Mechanisms
- Chemical Bonding (Preferred):
Requires compatible polymer pairs (see compatibility matrix below)
Molecular adhesion at interface creates monolithic structure
Peel strength: 5-15 N/cm depending on material pair
- Mechanical Interlocking (Backup):
Used when chemical compatibility is poor (PP overmolding)
Design features: dovetails, grooves, wrap-around edges
Provides 3-8 N/cm retention strength
Let’s see the process of overmolding as follows:
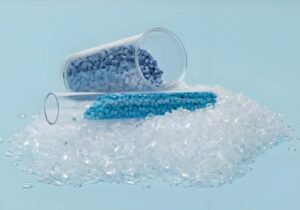
Material Selection
Material selection is the most important step in the whole process. You need to choose the best material to comply with both the internal and external physical requirements of the product. Several types of overmolding injection molding materials are as below.
- Polycarbonate (PC)
Polycarbonate has excellent impact resistance and transparency. Its common application includes bulletproof glass and protective equipment. Besides stability and durability, it can also fade. However, polycarbonate is more easily scratched and degrades under sunlight.
- Polyethylene (PE)
Polyethylene has a wide range of applications, from plastic bags and high-strength containers. In the injection process, high-density polyethylene (HDPE) and low-density polyethylene (LDPE) offer several options, from stable form or softer parts.
- Polypropylene (PP)
Polypropylene has excellent chemical stability and mechanical durability. Its common application is concluding the automobile parts, consumer goods, and movable hinges that need to be repeatedly bent, etc. Its chemical stability is suitable for health-related applications. Polypropylene has relatively poor resistance to ultraviolet rays. When used outdoors, additives need to be added for stability treatment.
- Acrylonitrile Butadiene Styrene (ABS)
ABS is stable and widely applied in thermoplastics. It has outstanding impact resistance, excellent thermal stability, and a smooth surface texture. ABS is easier to form and layer, and is suitable for decorative effects.
- Silicone Rubber
Silicone rubber is an excellent material for rubber overmolding due to its outstanding heat resistance, flexibility, and electrical insulation properties. It is commonly used to create waterproof seals, insulated cables, and protective casings for electronic devices.
Additionally, silicone bonds well with metals and certain plastics, making it ideal for healthcare products and kitchenware (such as baking molds) that require high-temperature resistance and sterilization capabilities.
Material Compatibility Matrix & Selection
Material selection determines bonding strength and part performance. Below is the compatibility data for common industrial pairs:
| Substrate | Overmold | Bonding Type | Melt Temp Diff | Peel Strength | Shore A | Application |
|---|---|---|---|---|---|---|
| ABS | TPE (SEBS) | Chemical | ≤30°C | 5-8 N/cm | 30-90 | Consumer electronics, tool handles |
| PC | TPU | Chemical + Mech | ≤30°C | 8-12 N/cm | 60-95 | Medical housings, phone cases |
| PC/ABS | TPE | Chemical | ≤30°C | 6-10 N/cm | 40-80 | Automotive interiors |
| Nylon 6/6 | Modified TPU | Mechanical* | ≤30°C | 4-6 N/cm | 70-90 | Engine components, gears |
| PP | TPV/TPO | Mechanical* | N/A | 3-5 N/cm | 50-70 | Automotive seals, gaskets |
| PBT | Liquid Silicone | Chemical | ≤50°C | 10-15 N/cm | 20-60 | High-temp electrical |
*Requires surface texturing or mechanical anchors; chemical primers improve bond by 40%.
Mold Design and Setup
Mold design must account for material characteristics and thickness, which differ from standard molds. Key considerations include maintaining a wall thickness of no more than 4mm and incorporating a gate for pouring, typically positioned at the thickest wall section.
Unlike conventional injection molds, overmolding employs a CNC-machined mold made from durable metals such as steel or aluminum to withstand the high pressure and temperature of the injection molding process.
Injection Molding Setup
The setup is designed for multi-material molding and precise stacking sequences. For double-material overmolding, a specialized rotating mold system is used, allowing each injection unit to deliver the required material with precision.
The process begins by injecting the base material. Once cooled, it forms a stable substrate for overmolding. A second material is then injected on top. In some cases, a single unit produces the initial part before applying elastomer materials in a subsequent step.
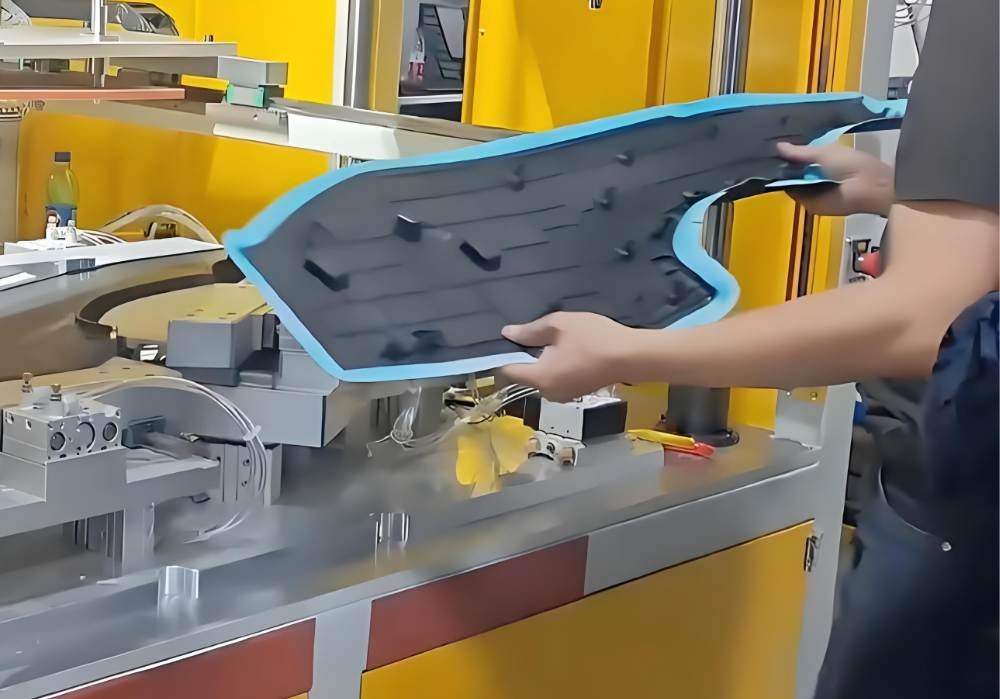
Ejection and Inspection
After forming, the parts are ejected from the mold and undergo a thorough defect inspection. Common issues include incomplete bonding, cavitation, and surface defects.
Post-Processing
The final part consists of a bonded multi-material structure but requires additional finishing. Post-processing may involve trimming excess material, polishing for better surface finish, or further curing to enhance material properties—ensuring the overmolded parts meet both functional and aesthetic requirements.
Overmolding Design for Manufacturability (DFM) Guidelines
Successful overmolding requires careful planning across several technical aspects. These fundamental design principles will help optimize your overmolding process:
Material Compatibility
Effective overmolding begins with thorough material evaluation. Key considerations include thermal properties (melting temperatures and expansion coefficients) and chemical compatibility between substrates. Select primary materials with higher melting points than secondary materials to prevent deformation, and account for differential shrinkage rates during cooling.
Wall Thickness & Geometry
Uniform Thickness: Maintain 2-4mm throughout part to prevent sink marks
Transitions: Minimum 0.5mm radii at all corners; avoid sharp edges (stress concentration)
Draft Angles: 1° per inch of depth minimum; 2-3° recommended for deep features (>50mm)
Gate Placement: Position at thickest wall section; use fan gates for wide TPE overlays
Bonding Enhancement Design
Mechanical Interlocks (When chemical bonding insufficient):
Dovetail Grooves: 60° angle, 0.5-1.0mm depth, spaced every 10-15mm
Wrap Features: Overmold wraps 0.5-1.0mm around substrate edges
Surface Texturing: 1-3μm Ra surface roughness increases mechanical bond strength by 30-50%
Chemical Bonding Optimization
Substrate Preheat: Maintain 60-100°C surface temperature during overmolding
Cleanliness: No oils, fingerprints, or release agents on substrate surface
Time Window: Overmold within 24 hours of substrate molding to prevent surface oxidation
Shrinkage Compensation
Differential Shrinkage: TPE shrinks 1.5-3%; ABS shrinks 0.4-0.7%
Design Solution: Allow for 0.1-0.2mm interference fit; design substrate 0.1mm oversized
Plan for Post-Processing
Post-processing considerations should be incorporated early in the design phase to ensure final product quality. Common finishing techniques include surface polishing for aesthetic enhancement, UV stabilization for outdoor durability, and specialized treatments like flame-retardant applications for electrical components. Additional curing processes may also be employed to optimize material properties, ensuring the finished product meets all performance and appearance specifications.
Common Defects & Troubleshooting
| Defect | Visual Indication | Root Cause | Solution |
|---|---|---|---|
| Delamination | Layer separation at interface | Inadequate substrate temp (<60°C) or incompatible materials | Increase mold temp to 80°C; add mechanical interlocks; verify material compatibility |
| Flash | Excess material at parting line | Excessive injection pressure (>150 MPa) or worn shutoffs | Reduce pressure 10-15%; check tool steel hardness (HRC 48-52 recommended) |
| Sink Marks | Surface depressions on thick sections | Insufficient cooling time or uneven wall thickness | Extend cooling 20%; optimize gate placement at thick sections |
| Poor Bond | Clean separation of layers | Surface contamination or oxidation | Clean with isopropyl alcohol; overmold within 4 hours of substrate production |
| Warping | Part distortion after ejection | Differential cooling rates | Balance cooling channels; maintain ±5°C mold temperature uniformity |
Cost Structure & Volume Economics
Overmolding isn’t cheap tooling. A two-shot mold with rotary platen typically costs 1.5 to 2 times what a single-shot tool runs—think $40,000 to $120,000 depending on cavity count and complexity. So when does the investment make sense?
Calculate your break-even based on volume and labor savings. If you’re currently assembling two parts with adhesive, you’re paying for:
- Two separate molding operations (two tools, two machines, two setups)
- Adhesive dispensing equipment and maintenance
- Curing time (30-60 seconds per part, often the bottleneck)
- Assembly labor (placing, aligning, pressing)
- Reject rates from misalignment or adhesive failure
Tooling Investment Breakdown
- Two-Shot Mold (Rotary Platen): $40k-$120k depending on cavity count
- Pick-n-Place System: $15k-$50k (robot + end-of-arm tooling)
- Secondary Operations: $5k-$15k (trimming fixtures, inspection gauges)
Production Cost Comparison
| Method | Cycle Time | Labor Cost | Break-Even Volume |
|---|---|---|---|
| Overmolding (Two-Shot) | 45-90 seconds | Low (automated) | 5,000-10,000 units |
| Overmolding (Pick-n-Place) | 60-120 seconds | Medium (handling) | 1,000-5,000 units |
| Assembly (Adhesive) | 30-60s + curing | High (manual) | <1,000 units |
Cost Advantage: Overmolding reduces per-part cost by 15-25% at volumes >10,000 units by eliminating adhesive dispensing and curing time.
Industry Applications & Standards
Medical Devices (ISO 13485)
- Requirements: ISO 10993 biocompatibility, USP Class VI, sterilization compatibility (autoclave 134°C)
- Common Pair: PC substrate + LSR overmold (sealing/gripping)
- Tolerances: ±0.05mm for fluidic connections, surface finish Ra 0.4-0.8μm
Automotive (IATF 16949)
- Requirements: Temperature resistance -40°C to 125°C (interior), chemical resistance (oils, fuels)
- Materials: PP + TPV for seals; ABS + TPE for instrument panels
- Testing: 1000-hour heat aging, 500-cycle thermal shock
Consumer Electronics
- Requirements: IP67/IP68 sealing, drop resistance (1.5m concrete), UV stability
- Materials: PC + TPU (phone cases); ABS + TPE (power tool handles)
- Aesthetics: Overmold allows dual-color/two-tone without painting
Overmolding vs. Insert Molding
How does overmolding differ from insert molding?
Overmolding layers a soft plastic over a plastic substrate, often in two shots. Insert molding molds plastic around a supplied insert such as metal, wiring, or a PCB.
Pick the soft-over-plastic route when you want grip, sealing, vibration damping, or two‑color cosmetics on a plastic substrate you already produce. You may get chemical bonding if materials match.
Use insert molding when the part includes metal components, threaded inserts, wiring, or electronics that must be encapsulated or fixed. Expect to rely on mechanical retention rather than chemical adhesion.
Quick Reference: Overmolding vs Insert Molding
| Parameter | Overmolding | Insert Molding |
|---|---|---|
| Core Material | Plastic substrate (ABS, PC, Nylon) | Metal insert (aluminum, brass, threaded inserts) |
| Overmold Material | TPE, TPU, LSR, TPV | Thermoplastic (PP, Nylon, PBT) |
| Bonding Mechanism | Chemical (molecular) + Mechanical | Mechanical (encapsulation) only |
| Primary Benefit | Soft-touch, sealing, vibration damping | Structural integration, electrical conductivity |
| Cost Impact | High tooling, low assembly | Medium tooling, zero assembly |
For detailed process selection guidance, see our Insert Molding vs Overmolding Strategic Guide.
Get Production-Ready Overmolding Services
At Fecision, we specialize in overmolding services and multi-material injection molding with in-process bonding validation.
Technical Capabilities:
- Tolerance: ±0.01mm precision for medical and automotive applications
- Materials: Full range of TPE (Shore A 20-90), TPU, LSR, and engineered substrates
- Certifications: ISO 9001:2015, ISO 13485 (medical), IATF 16949 (automotive)
- Validation: In-house peel testing (≥5 N/cm standard), CMM inspection, leak testing for IP ratings
DFM Support: Upload your CAD files for free design review focusing on:
- Material compatibility verification
- Gate placement and bonding surface optimization
- Cost reduction through design simplification
Overmolding FAQs
How Does the Substrate Differ from the Overmold Layer?
The substrate is the base component, often a rigid thermoplastic or metal insert. The overmold layer is typically softer or engineered for surface properties—such as TPE, TPU, or silicone—that provide comfort, slip resistance, or sealing. Compatibility determines whether bonding is chemical or mechanical.
What Changes versus Standard Single-shot Injection Molding?
You add steps for handling, cleaning, and fixturing the substrate. Tooling complexity increases—multi-cavity alignment, shutoffs, and gate placement matter more. Cycle time and equipment costs rise, but part consolidation and reduced post-assembly can cut overall product cost.
What Materials Are Commonly Used for the Overmold Layer?
Common choices include thermoplastic elastomers (TPE/TPR), thermoplastic polyurethane (TPU), and liquid or molded silicones for medical or high-temp needs. You’ll also see major engineering thermoplastics used for functional overmolds depending on performance requirements.
How do you test bond strength between substrate and overmold?
Standard peel test (ASTM D1876) requires ≥5 N/cm for chemical bonds, ≥3 N/cm for mechanical bonds. Cross-hatch adhesion test (ASTM D3359) should show >95% retention.
Can you overmold onto metal parts?
No—that process is called insert molding. Overmolding specifically refers to plastic-over-plastic bonding. However, you can overmold onto plastic parts that contain metal inserts from a previous insert molding step.
How Do You Decide between Overmolding and Insert Molding?
Use this process when you need plastic-over-plastic layers or soft-touch surfaces. Choose insert molding when you must encapsulate metal, electronics, or threaded inserts. Insert molding secures rigid inserts mechanically and electrically; overmolding focuses on polymer-to-polymer combinations and surface performance.