
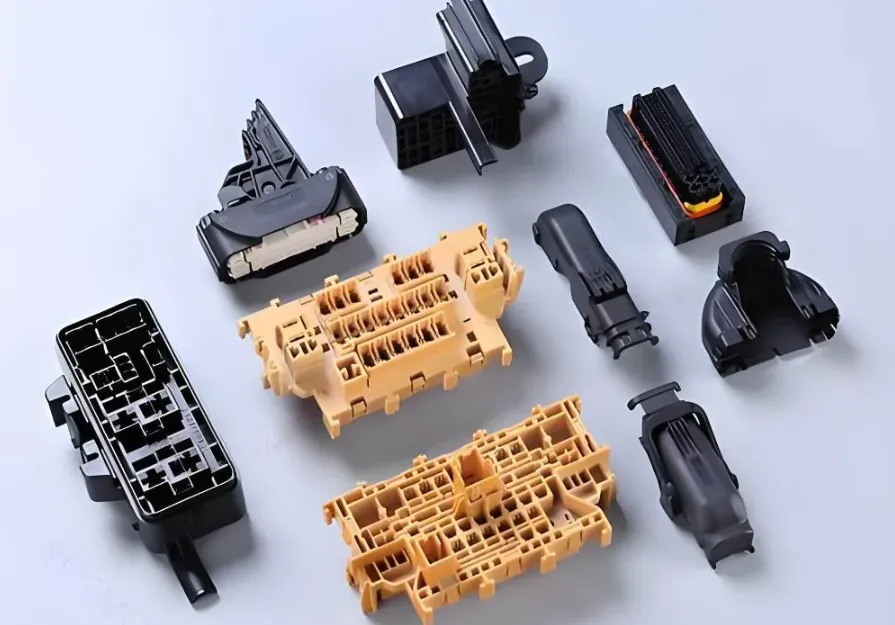
| Precision connector injection molding requires tighter tolerances (±0.005–0.05 mm on critical features), higher-performance resins (LCP, PPS, PA9T, PEEK), and more demanding tooling than general injection molding. The most consequential design decisions are material choice — which determines shrinkage, processing temperature, and achievable pitch — and gate placement, which controls both dimensional accuracy and weld line location. |
Connectors fail in two ways: electrically (contact resistance out of spec, signal integrity degradation) and mechanically (pin misalignment, housing fracture, mating force outside range). Both failure modes trace back to dimensional deviations that start at the design stage — in material selection, tolerance specification, and mold design choices made before a single cavity is cut.
This guide covers the full design chain: resin properties and processing parameters, geometry guidelines, tolerance tiers, mold design, insert molding, quality verification, and the defects most specific to connector production.
What Makes Connector Molding Distinctly Demanding
Most injection molding programs target tolerances of ±0.1–0.3 mm — achievable with standard tooling, standard materials, and experienced process control. Connector programs routinely require ±0.01–0.05 mm on contact pin pocket spacing, ±0.005 mm on individual pin pocket diameters, and surface finishes of Ra 0.4 µm or better on mating surfaces.
Three factors make these numbers harder to achieve in connectors than in most other precision parts:
- Pitch compression: As connectors move from 1.0 mm to 0.5 mm to 0.3 mm pitch, every wall and feature shrinks proportionally — but absolute tolerances do not scale with part size. A ±0.05 mm tolerance on a 0.3 mm pin pocket is 17% of the feature; on a 2.0 mm feature it’s 2.5%. Connectors operate in the regime where tolerance is a significant fraction of feature size.
- Signal integrity dependency: At 112 Gbps PAM4 data rates, pin position tolerance directly affects the bit error rate (BER) floor. A shift of even 20–30 µm in differential pair spacing changes the characteristic impedance and degrades eye margin. Connectors for high-speed SerDes interfaces are designed to IEC 60512 electrical test standards, where small dimensional deviations translate directly to measurable electrical performance loss. [1]
- Mating cycle requirements: A connector that must survive 500–10,000 insertion cycles must maintain contact geometry within tolerance throughout its rated life. Initial over-tolerance dimensions make this impossible — dimensions must start tightly controlled to remain in spec after wear.
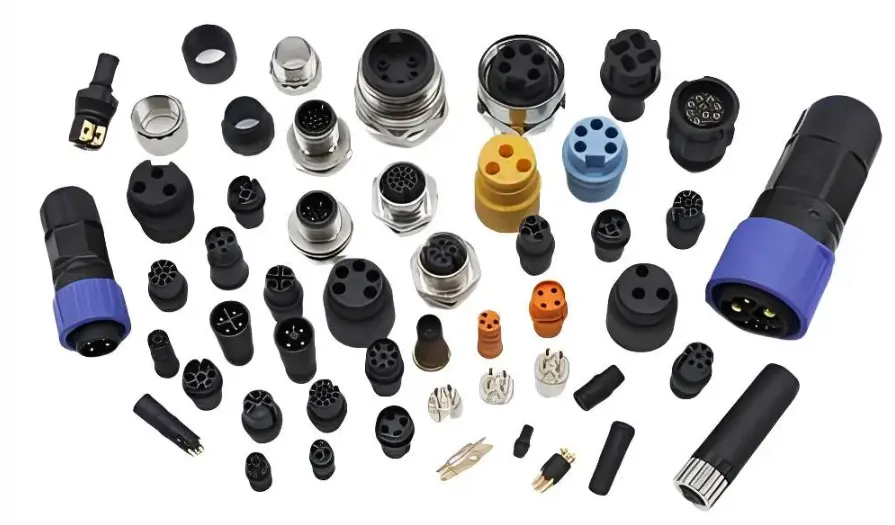
Material Selection: Five Resins and When to Use Each
The five resins below cover 95%+ of precision connector production. Resin selection drives every downstream decision: achievable pitch, processing complexity, tool material specification, and unit cost. The shrinkage and processing parameter columns are the most decision-critical.
| Resin | Temp Range | Shrinkage | Application Notes |
| LCP | –40 to +280°C | < 0.1% (flow dir.) | Lowest shrinkage of any connector resin; Single gate mandatory; Standard for 0.3–0.5 mm pitch board-to-board connectors. |
| PPS | –40 to +220°C | 0.5–0.7% (GF grades) | High temp, UL 94 V-0 inherently; Glass-filled grades reduce shrinkage but introduce anisotropy; Best choice for automotive underhood connectors and chemical-resistant housings. |
| PA9T | –40 to +265°C | 0.3–0.5% | Reflow-compatible to 265°C peak; Good flow at thin walls; Lower cost than LCP for SMT-compatible applications; Used widely in board-to-board and FPC connectors. |
| PEEK | –60 to +250°C | 0.4–0.6% | Extreme mechanical and thermal performance; Radiation-resistant; Highest processing temperature of all connector resins; Aerospace, military, and implantable applications. |
| PBT | –40 to +150°C | 1.5–2.5% (unfilled) | Widest-used general-purpose connector resin; Excellent dielectric stability; Higher shrinkage than LCP/PPS — unsuitable for sub-0.5 mm pitch without GF reinforcement; GF30 grade reduces shrinkage to 0.3–0.8%. |
| ⚠ LCP critical rule: use a single gate per connector housing. All other design decisions for LCP flow from this constraint: gate must be positioned at a single optimal location that fills the entire part without requiring a second gate. |
Electrical Property Requirements by Application
Beyond mechanical and thermal properties, connector resins must meet specific electrical specifications for their application:
- Dielectric constant (Dk): Lower is better for high-frequency signal integrity. LCP (Dk 3.2–3.5) and PEEK (Dk 3.2) are preferred for RF and high-speed digital connectors. PBT (Dk 4.0) is acceptable for lower-frequency applications.
- Dissipation factor (Df): Drives signal loss and heat generation. LCP (Df 0.003–0.004) is the best performer. PA9T (Df 0.008) is acceptable for SMT applications.
- Volume resistivity: All five resins exceed 10¹³ Ω·cm, sufficient for electrical isolation in connector applications. No selection decision is typically made on this criterion alone.
Tolerance Design: Three Tiers, Not a Single Specification
The most common engineering mistake in connector design is specifying ±0.01 mm globally across all dimensions on the drawing. Tight tolerances on non-critical dimensions add tooling cost and reduce achievable yield — without improving connector performance.
The correct approach: identify the five to ten dimensions that genuinely determine electrical and mechanical performance, specify micro tolerances there, and apply commercial tolerances everywhere else.
Commercial Tolerance: ±0.10–0.25 mm
This tier covers the overall housing envelope, non-mating walls, and any mounting feature that doesn’t engage a critical electrical or mechanical interface. It’s achievable in standard multi-cavity tooling without in-cavity pressure sensing, and it correctly applies to more than 70% of dimensions on a typical connector drawing. Specifying tighter tolerances here adds cost without improving connector performance.
Fine / Precision Tolerance: ±0.03–0.10 mm
Contact pin spacing, housing alignment ribs, and snap-lock engagement geometry fall in this tier. Achieving it reliably requires validated single- or dual-cavity tooling with EDM-machined cavity features to ±0.003 mm, and Cpk monitoring via in-cavity pressure sensors to confirm shot-to-shot repeatability.
Micro / Close Tolerance: ±0.005–0.020 mm
Individual contact pin pocket diameters, optical fiber alignment holes, and sub-0.5 mm pitch features require this tier. The tooling requirements are demanding: H13 steel at 48–52 HRC, all-electric press with a 14–18 mm micro-screw, and 100% CMM verification.
Apply these tolerances only to the dimensions that genuinely determine electrical and mechanical performance. Applying ±0.005 mm globally across a connector drawing is not practical — it inflates tooling cos and reduces achievable yield without improving the product.
Tolerance stack-up analysis is mandatory before finalizing individual feature tolerances. A board-to-board connector with three components, each with ±0.05 mm on mating interface position, produces a worst-case stack of ±0.15 mm — potentially preventing engagement.
Per ASME Y14.5 GD&T practice, run worst-case and statistical stack-up analyses on all mating interface dimensions before committing tooling dimensions.
Shrinkage Compensation by Resin
Cavity steel dimensions must be scaled to compensate for mold shrinkage. For precision connectors, use the values from the material table above — but apply compensation separately in the flow direction and cross-flow direction for anisotropic materials (GF-PPS, GF-PA9T).
Run mold flow simulation before cutting steel for any connector with pitch ≤ 0.5 mm. The shrinkage differential between flow and cross-flow in glass-filled resins can be 2–3×, making hand compensation unreliable.
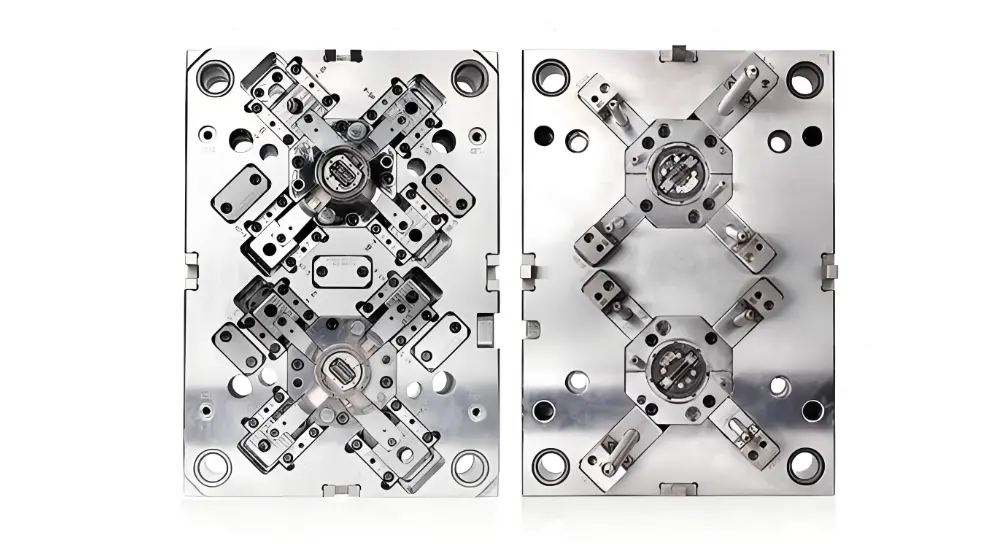
Mold Design: Eight Key Parameters for Connector Tooling
The guidelines below address the elements specific to connector molds — high cavity count, tight tolerances, abrasive engineering resins, and ejection of thin-walled housings without cosmetic or dimensional damage.
Wall Thickness
- General connector walls: 0.8–1.5 mm.
- Fine-pitch housings in LCP or PA9T can go as thin as 0.3–0.5 mm.
- Structural mounting features: 2.0–3.0 mm.
When thickness must change, keep the transition ratio at 3:1 maximum and taper over a distance equal to the wall height — abrupt steps trap air and create stress concentrations.
Draft Angles
- Standard surfaces: 0.5–1.0° per side.
- Textured surfaces: add 1° for every 0.025 mm of texture depth.
- Deep draws deeper than 5× the wall thickness: increase to 2–3°.
- Contact pin pockets are the exception — limit draft to 0.25–0.5° to preserve pitch accuracy across the pocket depth.
On mating interface surfaces, minimize draft entirely; tolerance matters more than ejection friction here.
Corner Radii
- Internal corners: ≥ 0.25 mm radius without exception.
- External corners: 0.5–1.0 mm.
Sharp internal corners are stress risers that initiate cracking in both the part and the mold steel. At thick-to-thin transitions, the fillet radius should be at least 50% of the thin wall thickness to maintain flow continuity.
Gate Placement and Type
Position gates at the thickest section and away from contact pin pockets and mating surfaces — gate vestige directly affects contact insertion force and mating accuracy.
- For LCP: single gate per housing, no exceptions (see the LCP weld-line warning above).
- For all other resins in multi-cavity tools: balance the runner so every cavity receives equal fill pressure.
For gate type:
- Edge gates are simple and suitable for prototypes and low-volume runs, but leave a visible vestige requiring manual removal.
- Submarine (tunnel) gates automate degating at ejection and are standard for high-volume production.
- Hot runners eliminate runner waste entirely — critical for LCP and PEEK with high resin cost — and add costs to tooling, typically paying back within 3–6 months at production volumes.
Cooling System
Uneven cooling is the leading cause of connector warpage. Target a maximum 5°C temperature differential across the mold face. Space cooling channels at 1.5–2× channel diameter apart, and keep them 1.5× channel diameter from the cavity surface.
For asymmetric connector housings — common in board-to-board connectors with uneven pin arrays — conformal cooling channels that follow the part contour reduce both cycle time (15–30%) and warpage better than straight-drilled channels can.
Ejection and Venting
Place ejector pins on non-cosmetic, non-functional surfaces only — and specify their locations in the design phase, not during tooling. Repositioning ejectors after a mold is built requires welding and re-machining.
For thin ribs and walls, blade ejectors prevent the deformation that round pins cause. For cylindrical boss features, sleeve ejectors distribute ejection force around the perimeter.
- Vent depth: 0.01–0.03 mm.
- Vent width: 3–6 mm.
- Land length: 1–2 mm.
LCP requires the shallow end, 0.01–0.015 mm, because its very low melt viscosity will push through wider vents and flash. Locate vents at the last-fill areas — typically the ends of connector housing legs and the far edges of fine-pitch pin arrays.
Tool Steel Selection
Standard P20 pre-hardened steel (28–32 HRC) is not suitable for LCP, PPS, or PEEK production tooling. These resins are processed at high temperatures and contain glass fiber reinforcement in many grades — both conditions accelerate cavity wear.
Specify H13 tool steel at 48–52 HRC for all cavity and core inserts in LCP, PPS, and PEEK programs. For LCP and PEEK at maximum fill velocities, tungsten carbide gate inserts extend gate life 3–5× compared to H13 at the gate area alone.
Multi-Cavity Tool Balancing
Most connector programs run 8 to 64 cavities per tool. Cavity-to-cavity dimensional variation is the primary quality challenge in high-cavitation connector tools. The root cause is almost always runner imbalance — unequal fill time and fill pressure between cavities on opposite sides of the runner system.
Specify naturally balanced (H-tree) runner layouts for equal path length from sprue to every cavity gate. Where space doesn’t permit a natural balance, use a Moldflow-optimized runner cross-section design with graduated runner sizes.
Cavity pressure sensors in each cavity close the loop — if any cavity begins to deviate, the press detects it shot-to-shot and alerts before out-of-tolerance parts accumulate.
→ Related: Precision connector mold manufacturing at Fecision
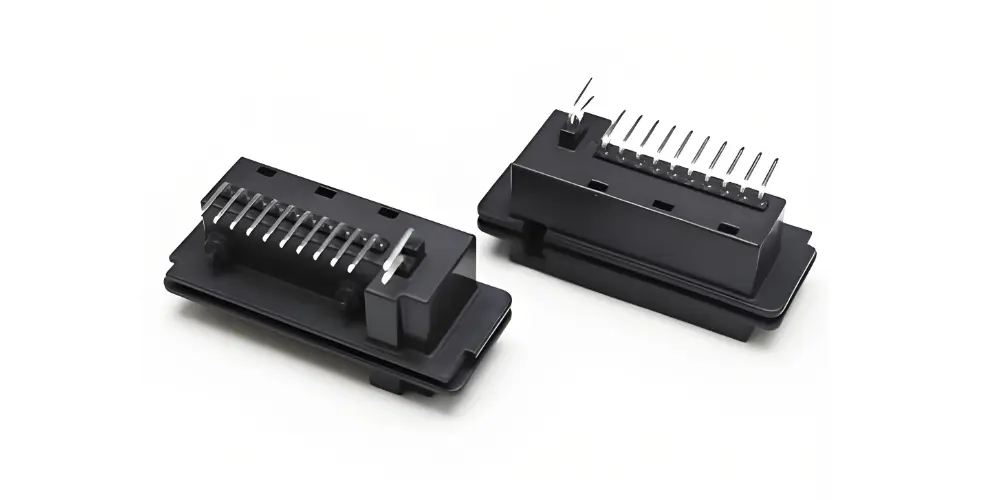
Insert Molding for Connector Contacts and Terminals
Most precision connectors are not purely plastic — metal contact pins, terminals, ground shields, and press-fit hardware are molded directly into the housing in a single operation. This is insert molding, and it’s the standard production method for connector programs that require integrated electrical contacts.
Why Insert Molding Instead of Post-Assembly
Inserting contacts after molding (press-fit or snap-in) requires tolerances on both the insert and the housing, multiplying stack-up. Insert molding bonds the metal to the plastic in a single operation — eliminating the assembled tolerance and providing a direct mechanical connection that resists pull-out forces in service.
Retention force: a properly insert-molded contact in LCP achieves pull-out forces of 50–200 N depending on geometry — substantially higher than press-fit alternatives, which rely on interference fit in a material that creeps over time.
Design Rules for Insert Molding
Thermal mismatch between metal inserts and connector resins is the primary failure mechanism. Copper alloy CTEs (~17 ppm/°C) differ significantly from LCP (~5–7 ppm/°C) and PPS (~5–6 ppm/°C). Under thermal cycling, this mismatch induces stress at the metal-polymer interface.
- Encapsulation wall: minimum 0.6 mm plastic wall surrounding the insert. Below this, the wall cracks under thermal stress within the rated service cycles.
- Insert surface: radius all sharp edges to ≥ 0.2 mm. Sharp metal edges create stress concentrations in the polymer directly at the interface.
- Preheat inserts: 120–150°C before placement in the mold. Cold inserts cause the polymer melt to freeze prematurely at the interface, creating voids and a weak encapsulation bond.
- Insert registration: design positive register features (shoulder, groove, or knurl) on the metal insert to prevent rotation and axial movement under mating force. The plastic encapsulation alone is not sufficient for inserts subject to torque.
- Material compatibility: LCP and PPS are the best choices for insert molding due to their low CTE, which reduces interface stress. PBT’s higher CTE (~ 60–80 ppm/°C) increases stress — consider GF-reinforced PBT to bring CTE closer to metal.
Quality Control for Precision Connectors
Dimensional Inspection
Connector inspection requires measurement equipment matched to the tolerance tier of the features being checked:
- CMM (Coordinate Measuring Machine): ±0.002 mm accuracy. Used for 3D profiling of housing geometry, pin pocket position, and mating interface dimensions. First-article inspection: 100% of critical dimensions. In-process: critical dimensions every 2 hours or 500 shots, whichever is shorter.
- Optical comparators / vision systems: Profile verification for complex housing geometries. Automated vision inspection at 100% of production for visible surface defects and contact pin presence.
- Pin gauges: Go/no-go verification of contact pin pocket diameters. Fast, repeatable, and suited to high-volume in-process inspection.
- Final inspection: Per sampling plan — AQL 0.65 is standard for precision connectors. PPAP Level 3 documentation for automotive connectors (includes dimensional results, material certifications, and process capability studies).
Electrical and Functional Testing
Dimensional accuracy is necessary but not sufficient. Connector performance must be validated electrically and mechanically per IEC 60512 series test methods: [1]
- Contact resistance: initial < 10 mΩ for signal contacts; < 5 mΩ for power contacts. Measured per IEC 60512-2.
- Insulation resistance: > 1,000 MΩ between adjacent contacts. Measured per IEC 60512-2.
- Mating/unmating force: measured per IEC 60512-13. Must fall within the specified range across 500–10,000 duty cycles depending on the mating cycle rating.
- Durability cycling: 500+ mating cycles at rated force per IEC 60512-9. Contact resistance measured before and after — must remain within specification.
- Thermal shock: –40°C to +125°C, 100–500 cycles for automotive connectors per USCAR-2. Verifies that insert-polymer interface maintains integrity through temperature excursions.
Visual Inspection Criteria
- Sink marks: not acceptable on mating surfaces or any surface within 1 mm of a contact pin pocket.
- Flash: maximum 0.05 mm. Flash on mating interface surfaces: zero tolerance — any flash affects insertion force and contact position.
- Contamination: zero tolerance for foreign particles in contact pin pockets.
- Weld lines: not acceptable across contact pin pockets or mating interface geometry.
Common Defects and Connector-Specific Solutions
Warpage
The most common connector defect, and the hardest to fix after tooling is cut. Root causes: uneven cooling (temperature differential above 5°C between mold faces), anisotropic shrinkage in glass-filled PPS or PA9T, and residual stress from unbalanced fill.
The corrective approach in order: balance the cooling channels first, then verify gate placement with mold flow simulation, then extend cooling time if needed. For GF grades, mold flow simulation predicts fiber orientation — which determines the direction and magnitude of shrinkage differential — before any steel is committed.
Sink Marks
Thick mounting bosses and wall junctions cool slower than adjacent thin walls, pulling material inward as the core solidifies.
Fix: core out thick bosses to bring wall thickness toward uniformity. Also verify that the gate isn’t undersized — a gate that freezes off early cuts short the pack phase, and inadequate packing is the second most common sink cause after excessive wall thickness variation.
Flash
Excess plastic bleeding at the parting line. For most resins, the cause is injection pressure too high for the clamping force available — check projected area × material factor against machine tonnage. For LCP specifically, flash is more common because LCP melt viscosity is unusually low: it flows into vent gaps and parting line imperfections that other resins would not penetrate.
LCP programs require shallower vents (0.01–0.015 mm vs 0.025–0.03 mm for PBT), verified H13 tool steel condition at the parting line, and periodic parting line inspection every 50,000–100,000 shots.
Weld Lines — Critical for LCP
Where two melt fronts meet, a weld line forms. In most resins, weld lines are a cosmetic concern; in LCP, they are a structural failure risk. LCP weld-line strength is lower than the base resin strength of every other connector-grade engineering plastic. A weld plane at a contact pin pocket, across a snap-lock feature, or at the edge of a mating surface can fail under normal service conditions.
The only reliable solution is a single gate positioned so the entire housing fills from one flow front. For resins other than LCP, minimize weld lines at functional geometry by gate placement; raise melt and mold temperatures to improve weld-line knit strength.
Short Shots
In fine-pitch connectors with 0.3–0.5 mm walls, the melt front freezes before reaching the ends of thin sections if injection speed is insufficient. LCP’s fill time should be 0.2–0.3 seconds — slower than that causes premature crystallization at the flow front.
Also check gate diameter (minimum 0.4 mm for LCP thin-wall work) and verify venting at last-fill locations. A blocked vent creates a gas trap that stops fill as effectively as insufficient injection pressure.
Stress Cracking at Insert Interfaces
When metal contact pins or terminals are insert molded into a connector housing, thermal mismatch between the metal (CTE ~17 ppm/°C for copper alloys) and the polymer (LCP: ~5–7 ppm/°C, PBT: ~60–80 ppm/°C) generates interfacial stress under thermal cycling.
The fixes: preheat inserts to 120–150°C before loading, radius all sharp metal edges to ≥ 0.2 mm, and maintain a minimum 0.6 mm encapsulation wall. LCP and PPS are the best choices for insert-molded connectors precisely because their low CTE reduces interface stress.
Cost Optimization Without Compromising Performance
Tooling Volume Strategy
Match tool material and cavity count to production volume.
- Aluminum soft tooling handles prototypes and low-volume runs up to roughly 10,000 parts (tool life 10,000–50,000 shots).
- P20 pre-hardened steel covers medium-volume programs to 100,000–500,000 shots — but is not suitable for LCP, PPS, or PEEK due to abrasive wear.
- H13 hardened steel at 48–52 HRC is mandatory for high-volume LCP, PPS, and PEEK programs and achieves 500,000–1,000,000+ shot life.
Bridge tooling in semi-hardened steel offers a faster, lower-cost path for 5,000–50,000 unit market validation runs before committing full production tooling budget.
Design Choices That Reduce Total Cost
- Apply tight tolerances selectively: ±0.01 mm on all dimensions adds to tooling cost and reduces yield. Apply micro tolerances only to contact pin pockets and mating interface geometry.
- Hot runners pay back at volume: considering high cost for LCP or PEEK, runner waste in cold-runner tools becomes significant above 50,000 parts annually. A $10,000 hot runner investment typically pays back within 3–6 months at these resin prices.
- Multi-cavity tools: 16–64 cavity tools reduce per-part machine time proportionally, but require naturally balanced runners and tighter process control to maintain cavity-to-cavity dimensional consistency.
- Single-gate LCP design: avoiding multiple gates in LCP programs eliminates the risk of structural weld planes, reduces tooling complexity, and eliminates the need for runner balancing between gate positions.
Precision Connector Molding at Fecision
Fecision designs and manufactures precision connector molds from DFM review through high-volume production. Our connector tooling operates to ±0.005 mm on critical features.
- Materials in production: LCP, PPS, PA9T, PEEK, PBT, PBT-GF30 — all standard connector grades. Dedicated desiccant drying per material.
- Tooling: H13 48–52 HRC for all LCP, PPS, and PEEK production tools. EDM machining to ±0.003 mm on cavity features. Conformal cooling available for complex geometries.
- Insert molding: metal contact pins, terminals, and hardware — insert preheat station standard on connector production cells.
- Quality: ISO 9001:2015 certified. CMM first-article inspection. Cavity pressure monitoring. IEC 60512 electrical testing capability.
- DFM: Gate location analysis (including LCP single-gate verification), mold flow simulation, tolerance stack-up review — included with every quote at no charge.
Partnering with an experienced precision molding supplier is essential to achieve the tight tolerances and consistent quality required for modern electronic connectors. At Fecision, our engineering team specializes in high-precision connector molding for demanding applications, ensuring reliable performance and compliance with industry standards.
Need help with your precision connector molding project? Contact us for expert DFM feedback and a detailed project quote.
Frequently Asked Questions
What is the minimum wall thickness for precision connectors?
With proper material selection (such as LCP) and mold design, fine-pitch connectors can feature walls as thin as 0.3 mm. General-purpose connectors typically use 0.8 mm to 1.5 mm walls for a balance of strength and manufacturability.
How tight can tolerances be held in connector molding?
On critical features (individual pin pocket diameters, mating interface geometry) with H13 hardened tooling and in-cavity pressure monitoring: ±0.005 mm (±0.0002″) is achievable with Cpk ≥ 1.67.
Why does LCP require a single gate?
LCP’s weld-line strength is lower than all other connector-grade engineering plastics. Where two LCP flow fronts meet, the resulting weld plane is structurally weak and can fail under mating force, vibration, or thermal cycling. Using a single gate eliminates all weld lines.
What is the typical mold life for connector production?
Hardened steel molds for high-volume production typically achieve 500,000 to 1,000,000 cycles. Aluminum prototype molds, by comparison, last 10,000 to 50,000 cycles and are ideal for early-stage development.
Can metal contacts be insert molded into precision connector housings?
Yes — insert molding is the standard approach for integrated contacts. Preheat inserts to 120–150°C before molding, maintain ≥ 0.6 mm encapsulation wall, and radius all sharp insert edges to ≥ 0.2 mm. LCP and PPS are preferred for insert molding due to their low CTE, which minimizes thermal mismatch stress at the metal-polymer interface.
How are precision connectors tested after molding?
Per IEC 60512 series: contact resistance (< 10 mΩ initial), insulation resistance (> 1,000 MΩ), mating/unmating force, and durability cycling (500+ cycles). Automotive connectors add thermal shock testing per USCAR-2 (–40°C to +125°C, up to 500 cycles). Dimensional inspection to CMM ±0.002 mm accuracy with 100% first-article inspection.
References
Accessed May 2026.
[1] IEC 60512 — Connectors for Electronic Equipment: Tests and Measurements. https://www.iec.ch/standards/63185
[2] Sumitomo Chemical Co., Ltd. SUMIKASUPER LCP — Injection Molding Machine and Mold Design Guide. https://www.sumitomo-chem.co.jp/sep/english/products/lcp/lcp_s2_sekkei.html
[3] IPC/WHMA-A-620 — Requirements and Acceptance for Cable and Wire Harness Assemblies. https://shop.ipc.org/ipc-whma-a-620/ipc-whma-a-620e-english-pdf-0-0