| Overmolding molds a second material — typically a soft elastomer like TPE or silicone — over a pre-made plastic substrate to add grip, sealing, or aesthetic contrast. Insert molding places a pre-formed metal or functional component into a mold, then injects plastic around it in one shot. Both combine materials into a single part but serve fundamentally different engineering purposes. |
These two processes get confused because they both produce multi-material parts. But the confusion costs time in sourcing, money in tooling, and sometimes the part itself when the wrong method is committed to before a DFM review.
The clearest distinction: overmolding adds a surface layer. Insert molding embeds a component. One is about function and feel at the surface. The other is about integrating structural or electrical elements at the core. So insert mold vs overmold, which one to choose? Let’s explore more.
What Is Overmolding?
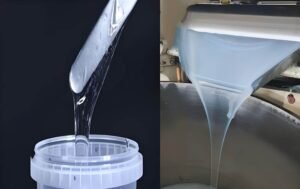
Overmolding is a two-stage injection molding process. A base part — called the substrate — is molded first from a rigid material. Then the substrate is placed into a second mold (or the tool rotates in a two-shot machine), and a second material is injected over selected areas of its surface.
The bond between the two materials is primarily chemical — both layers must be compatible at a molecular level to fuse without delaminating under service conditions. Mechanical interlocking through designed undercuts or surface texture provides backup adhesion when chemical compatibility is marginal.
Two-Shot Molding vs. Transfer (Sequential) Overmolding
There are two main production routes, and the choice affects tooling cost, cycle time, and bonding quality significantly:
- Two-shot molding: A single press with two injection barrels. The substrate is molded in the first shot; the tool rotates or indexes to present the substrate to the second barrel, which injects the overmold material. Both operations occur within one machine and one cycle — typically 15–30% faster than transfer overmolding, with stronger interface bonding because the substrate is still warm. Higher tooling cost, but preferred for high-volume production.
- Transfer (sequential) overmolding: The substrate is molded on one machine, ejected, cooled, and then manually or robotically transferred to a second machine for the overmolding step. Lower tooling cost — two standard molds instead of a complex two-shot tool — but adds labour, introduces substrate cooling (which can reduce bond strength), and is generally slower at volume.
Common Overmolding Materials
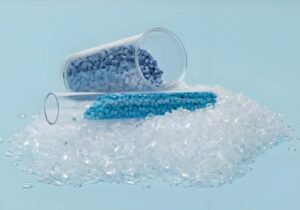
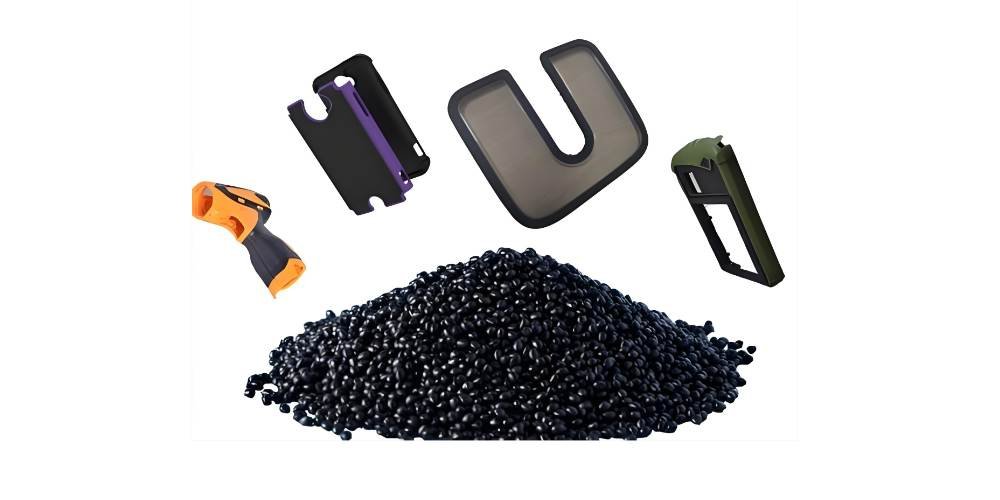
The substrate is typically a rigid engineering plastic: ABS, polycarbonate (PC), polypropylene (PP), or nylon (PA). The overmold layer is almost always a soft or flexible material — thermoplastic elastomers (TPE, TPU), silicone, or soft PVC.
Material compatibility is the single biggest design constraint. TPE bonds well to ABS and PC through chemical affinity at the interface; silicone generally does not, requiring mechanical interlocking or plasma surface treatment. Testing compatibility on sample plaques before committing to tooling is standard practice for any new material pair.
When Overmolding Adds Real Value
- Ergonomic grips: Power tool handles, surgical instrument handles, consumer device housings. TPE over rigid ABS provides grip and reduces user fatigue in one molded part.
- Integrated sealing: A soft elastomer overmold can create a waterproof or IP-rated seal around a housing — eliminating a separate gasket assembly step.
- Vibration and noise damping: Industrial equipment handles and machine components benefit from the damping properties of TPE or rubber overmolds.
- Multi-colour and brand aesthetics: Contrasting colours, logos, and textures can be molded in — no painting or secondary decoration required.
What Is Insert Molding?
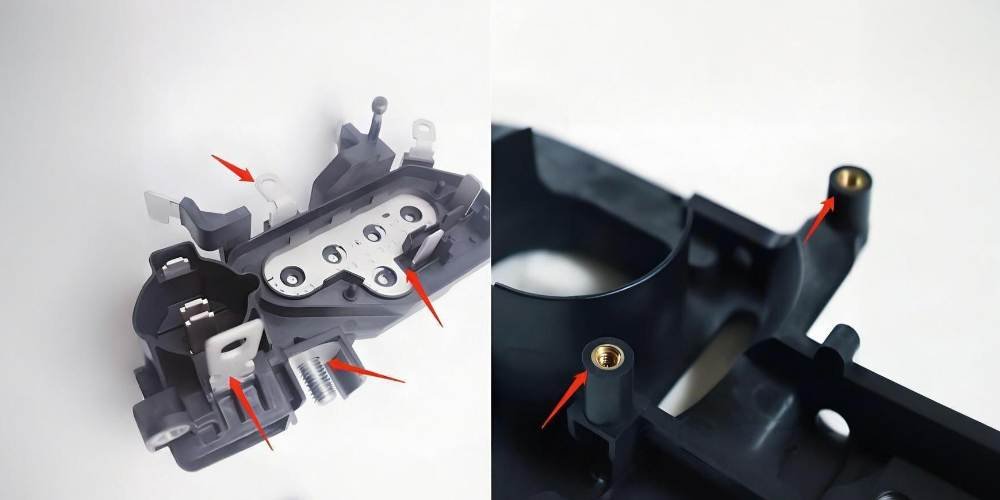
Insert molding is a single-shot process. A pre-formed insert — most commonly a metal component, but also ceramic, glass, or a previously molded plastic part — is placed into the mold cavity before injection. When the plastic is injected, it flows around and encapsulates the insert, bonding to it mechanically through knurled surfaces, holes, and undercuts as it cools.
The bond in insert molding is primarily mechanical rather than chemical. The plastic grips the insert’s surface geometry — knurled brass threads, undercut profiles, holes through the insert. This mechanical interlock is why insert molding works reliably with dissimilar materials like metal and plastic where chemical bonding is not possible.
Common Insert Types and Applications
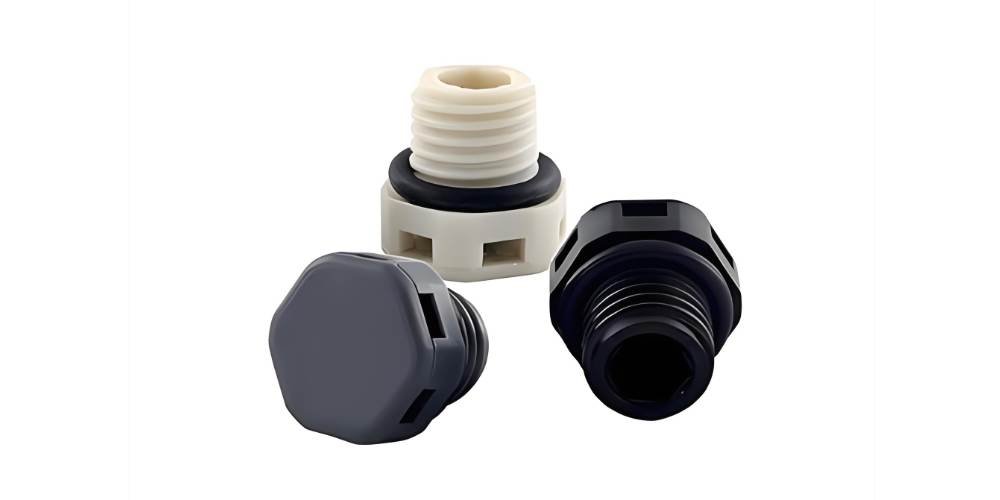
- Brass threaded inserts: The most common application. Knurled brass inserts are molded into plastic housings, electronics enclosures, and consumer goods to provide durable threaded attachment points that resist stripping under repeated assembly. Brass is used because its thermal expansion coefficient is relatively close to many plastics, reducing stress at the interface.
- Steel pins and shafts: Rotational or load-bearing components where plastic alone would fatigue. Common in automotive mechanisms, gear assemblies, and medical device actuators.
- Electrical terminals and connectors: Contacts and pins for USB connectors, sensor housings, and printed circuit board standoffs are insert molded to eliminate separate assembly steps and reduce contact resistance.
- Ceramic and glass components: Sensor elements, optical lenses, and dielectric components are encapsulated in plastic via insert molding to protect them and provide mounting geometry.
Insert Placement and Positioning
Precise insert positioning is the primary manufacturing challenge. A metal insert that moves even 0.1–0.2mm during injection can cause plastic flash over threaded features or a wall section that is too thin to provide mechanical strength.
Inserts are loaded either manually by an operator or robotically. Automated robotic loading improves positioning repeatability to ±0.05mm and removes the throughput bottleneck that limits manual insert molding to lower volumes. For medical devices and connectors, robotic loading with in-mold vision verification is standard.
Large metal inserts (above ~50g) should be pre-heated to 150–200°C before loading to reduce thermal shock when the hot plastic contacts the cold metal — thermal shock creates internal stresses and can cause micro-cracking in the plastic around the insert interface.
Overmolding vs. Insert Molding: Direct Comparison
This table maps the nine most important engineering and manufacturing dimensions. Both processes produce multi-material parts — the differences lie in what problem each is solving.
| Dimension | Overmolding | Insert Molding |
| Core mechanism | A pre-formed base part (substrate) is placed into a second mold, and a different material is injected over it. Two sequential mold operations. | A pre-formed insert — typically metal — is placed into a mold, and plastic is injected around it to encapsulate the insert in one shot. |
| Number of molds | Two molds minimum (substrate mold + overmold). Two-shot machines combine both in a single press. | One mold. The insert is loaded before injection; plastic flows around it in the same cycle. |
| Typical materials | Substrate: ABS, PC, PA. Overmold layer: TPE, TPU, silicone, soft PVC. Must be chemically compatible. | Insert: brass, steel, aluminium, ceramic, pre-molded plastic. Plastic: PA, PBT, PPS, PC — engineering grades that bond mechanically to the insert. |
| Bond mechanism | Primarily chemical bonding (material compatibility required) + mechanical interlocking where designed. | Primarily mechanical — plastic flows around knurls, holes, and undercuts on the insert surface. Chemical bond is secondary. |
| Process speed | Slower. Two mold operations required. Two-shot in one press is faster than transfer, but still slower than single-shot. | Faster. Single shot per part once the insert is positioned. Robotic insert loading reduces per-cycle time significantly. |
| Tooling cost | Higher. Two-shot tooling or two separate molds. Complex rotary cores add cost. | Lower. Single mold, though insert positioning fixtures and verification tooling add cost for precision applications. |
| Volume sweet spot | High volume. Two-shot tooling pays back through cycle time savings and zero transfer labour. | Medium to high volume. Single-mold efficiency, but manual insert loading limits throughput unless automated. |
| DFM complexity | Material compatibility testing required. Substrate surface prep may be needed. Gate location must avoid substrate damage. | Insert positioning tolerances critical — misalignment ruins the part. Insert pre-heating may be required for large metal inserts. |
| Best for | Ergonomic grips, waterproof seals, multi-colour parts, vibration damping, soft-touch electronics housings. | Threaded bosses, electrical terminals, metal reinforcement, embedded sensors, structural load-bearing components. |
| One clarification on terminology Some sources describe overmolding as a ‘type of insert molding.’ This reflects one way to define the processes at a high level — both involve placing something into a mold and injecting plastic. In standard manufacturing practice, however, insert molding and overmolding are treated as distinct processes because they solve different problems, use different tooling architectures, and serve different applications. |
Material Compatibility: Substrate-to-Overmold Pairings
Material selection is where most overmolding failures originate. Unlike insert molding — where the bond is mechanical and material types are dissimilar by design — overmolding requires the two polymers to bond chemically at their interface.
The compatibility depends on surface energy, chemical similarity, and processing temperatures. A material pair that bonds reliably in the lab may delaminate in service if the overmold is too thin, the substrate was contaminated before overmolding, or processing temperatures were too low for adequate interface fusion.
| Substrate / Insert | Overmold / Plastic | Compatibility | Notes |
| ABS | TPE / TPU | ✅ Excellent | Most common pairing for tool handles and consumer electronics. Strong chemical bond, widely validated. |
| PC | TPE / TPU | ✅ Good | Works well for medical devices and electronics housings. Substrate surface must be clean and dry. |
| PP | TPE (PP-based) | ✅ Good | PP substrate requires PP-based TPE for chemical compatibility. Standard polyolefin overmolding. |
| PA (Nylon) | TPE | ⚠️ Moderate | Moisture absorption in nylon substrate can cause adhesion issues. Pre-dry substrate before overmolding. |
| ABS | Silicone | ⚠️ Moderate | Silicone does not bond chemically to ABS — mechanical interlocking required. Plasma treatment improves adhesion. |
| PC | Silicone | ⚠️ Moderate | Same challenge as ABS + silicone. Primer or mechanical lock design recommended. |
| PA | Some rubbers | ❌ Poor | Chemical incompatibility. Layer separation risk under thermal cycling. Validate before production commitment. |
| Brass | PA / PBT | ✅ Excellent | Standard for threaded inserts. Knurled brass bonds mechanically. Used in electronics and automotive. |
| Steel | PA / PPS | ✅ Good | Structural inserts in high-load applications. Pre-heat steel inserts to 150–200°C to reduce thermal shock. |
Design for Manufacturability: Key Rules for Each Process
DFM for Overmolding
- Wall thickness of overmold layer: 60–80% of substrate wall thickness is a reliable starting ratio. Too thin causes the overmold to cool unevenly and creates internal stresses. Too thick increases cooling time and can cause sink marks.
- Draft angles: Minimum 2–3° on overmold surfaces — softer materials grip the tool surface harder than rigid plastics. Insufficient draft is the most common cause of tearing and surface damage during ejection.
- Gate location: Gate onto the overmold layer, not directly onto the substrate interface. Gating at the interface creates jetting that can contaminate the bonding surface before the overmold material reaches it.
- Surface preparation of substrate: Clean, dry, and free from mold release agents. Even a thin film of release agent will prevent chemical bonding. For marginal compatibility pairs, plasma treatment of the substrate surface can raise surface energy by 30–50% and dramatically improve adhesion.
- Overflow wells: Small overflow features at the ends of overmold channels help vent trapped gas and ensure the overmold material reaches full fill without shorts. Particularly important for thin-wall overmold sections.
DFM for Insert Molding
- Insert surface geometry: Knurled patterns, undercuts, and through-holes are the primary mechanical bond features. A diamond knurl at 0.5mm pitch provides excellent pull-out resistance for brass threaded inserts. Smooth inserts rely entirely on compressive grip and will loosen under thermal cycling.
- Minimum plastic wall around insert: At least 0.8mm of plastic on all sides of a metal insert is the minimum; 1.2–1.5mm is preferred. Walls thinner than 0.8mm are prone to cracking from the thermal stress when the plastic cools around the metal.
- Insert positioning features in the mold: The mold must have locating pins or sockets that hold the insert to ±0.1mm before injection. Loose inserts shift during injection pressure (which can reach 30,000–60,000 psi) and ruin part geometry.
- Flash prevention: Sealing surfaces on the mold that bear against the insert face must be flat and burr-free. Any gap allows plastic to flash over threaded or functional surfaces, rendering the insert unusable without secondary deflashing operations.
- Plastic selection for metal inserts: Engineering grades with low shrinkage are preferred — PBT, PPS, and glass-filled PA retain their grip on metal inserts under thermal cycling. Amorphous plastics like ABS and PC have lower shrinkage than semi-crystalline grades and maintain tighter interference fits around inserts.
How to Know If Overmolding or Insert Molding Is Better for Your Project?
Choosing between insert molding vs overmolding for your project can feel confusing. Both methods involve adding layers to a base part, but they work differently. To pick the right one, focus on your product’s purpose, materials, and production needs. Here’s a simple breakdown to help you decide.
1. Start With the Base Material
The first thing to check is what your base part is made of. Insert molding uses a non-plastic base—like metal, wires, or electronic parts. For example, screwdriver handles often use insert molding: a metal rod (the insert) gets covered with plastic in one step. If your project involves combining plastic with metal, circuits, or prefabricated parts, insert molding is likely better.
Overmolding requires a plastic base (called a substrate). The second layer is another plastic or rubber material molded onto it. Think of toothbrush handles: a hard plastic core gets coated with a soft rubber grip. If your design needs multiple plastic layers (like a rigid core + soft exterior), overmolding fits best.
2. Look at How Many Steps You Can Handle
Insert molding is a single-step process. The insert gets placed into the mold, plastic is injected around it, and the part is done. This saves time and cuts assembly costs since there’s no need to attach parts later. For instance, medical tools with embedded sensors use insert molding to seal electronics inside plastic in one go.
Overmolding requires two steps. First, the substrate is molded. Then, it’s moved to a second mold for the outer layer. This adds time and cost, especially for small batches. But it’s worth it for complex designs. A tool handle with a non-slip grip, for example, might need two materials that can’t be molded together in one shot.
3. Check Material Compatibility
Materials must stick together well. With insert molding, plastic bonds to metals or other inserts mechanically—the plastic flows around the insert’s shape, locking it in place. No chemical bond is needed. This works for parts like threaded metal inserts in plastic casings.
Overmolding needs materials that bond chemically or melt at similar temperatures. For example, ABS plastic pairs well with TPU rubber for grips. If materials don’t bond naturally, the layers might separate. A common fix is adding grooves or undercuts to the substrate so the overmold locks in physically.
4. Consider Costs and Volume
For high-volume production, insert molding often costs less. Once the mold is set, adding inserts (like metal fasteners) is fast. Automotive parts, such as dashboard components with built-in clips, use this method to save on assembly labor.
Overmolding is pricier upfront because it needs two molds. But it pays off for specialized products. A consumer device with a waterproof seal (like a rubber-coated USB port) might need overmolding to avoid leaks. For low-volume batches, though, the extra mold costs can be hard to justify.
5. Test for Functionality
Ask: What does the part need to do?
- Strength and durability: Insert molding strengthens parts by combining metal and plastic. Tools like pliers benefit from metal inserts that handle heavy force.
- Comfort or grip: Overmolding adds soft, ergonomic layers. Handheld devices (e.g., power drills) often use rubberized overmolds for better grip.
- Aesthetics: The overmolding process allows color contrasts or textures. A two-tone phone case can be made by molding a colored layer over a base.
6. Prototype and Consult Experts
Before finalizing, make prototypes. Try both methods if possible. For example, mold a metal insert into a plastic sample and check if it holds under stress. For overmolding, test if the layers bond without peeling.
Talk to manufacturers early. They can spot issues like incompatible materials or complex mold designs. For instance, a supplier might suggest using insert molding for a part with embedded wiring to avoid damaging delicate components during assembly.
Final Tips
Choose insert injection molding if:
- Your base part is metal, ceramic, or electronic.
- You need to embed pre-made parts (screws, sensors) in plastic.
- Reducing assembly steps is critical.
Choose overmolding if:
- You need multiple plastic/rubber layers.
- The product requires soft grips, seals, or decorative finishes.
- Chemical bonding between materials is possible.
Still unsure? Start with a small batch. Test both methods with simple parts to see which meets your quality and budget needs. For example, create a prototype handle using insert molding (metal core + plastic) and another using overmolding (hard plastic + rubber). Compare their feel, durability, and cost to decide.
By focusing on your project’s materials, steps, and end use, you’ll find the best method without guesswork.
Applications of Both Processes by Industry
Medical Devices
Overmolding is the default for patient-contact surfaces — surgical instrument handles, blood pressure monitor cuffs, infusion pump housings, and respiratory mask seals. Medical-grade TPE or silicone provides a skin-friendly, sterilisation-compatible surface that eliminates separate sealing components.
Insert molding is used where functional integration matters — pacemaker housings with embedded electrodes, surgical tool handles with embedded sensors, and catheter assemblies with metal reinforcement rings to prevent kinking.
Consumer Electronics
Overmolding dominates at the user interface — USB cable strain reliefs, earphone housings, power bank casings with rubberised grip, and wearable device straps. The ability to create IP-rated seals through integrated elastomer overmolds reduces assembly steps and bill-of-materials count.
Insert molding handles structural connectivity — threaded bosses for screws that assemble the device, antenna inserts in mobile housings, and metal heat-spreader elements inside polymer casings. The goal is always the same: get the strength of metal where the part needs it without the weight or cost of an all-metal design.
Industrial & Automotive
Insert molding is more prevalent in industrial applications than overmolding, because structural load-bearing requirements dominate. Brake pedal assemblies, gear selector linkages, and connector housings embed metal load paths directly into plastic to meet fatigue life requirements that plastic alone cannot achieve.
Overmolding serves the ergonomic and sealing layer. Vibration-damping grips on hand tools, soft-touch control panels, and waterproof connector boots are all overmolded over rigid substrates that provide the structural form.
Frequently Asked Questions
Is overmolding the same as two-shot molding?
Two-shot molding is one method of overmolding — specifically, the automated version where both shots happen in a single press without transferring the substrate between machines.
Can you overmold silicone onto plastic?
Yes, but it requires care. Liquid silicone rubber (LSR) does not bond chemically to most thermoplastics — it bonds to PA66, PA12, and certain reactive substrates, but not reliably to ABS or PC without surface treatment.
What materials can be used as inserts in insert molding?
Metal inserts (brass, steel, aluminium) are by far the most common. Brass is preferred for threaded inserts because its thermal expansion coefficient is closer to engineering plastics than steel, reducing interface stress under thermal cycling.
Which process has lower tooling cost?
Insert molding generally has lower tooling cost — a single mold versus two molds or complex two-shot tooling for overmolding. However, insert positioning fixtures, robotic loading systems, and insert sourcing add cost that is not captured in the mold quote alone.
Conclusion
Overmolding and insert molding both produce multi-material parts in a single assembly. They are not interchangeable — each solves a distinct category of manufacturing problem.
Overmolding is the right choice when the goal is adding grip, sealing, aesthetics, or damping to a plastic structure. Material compatibility is the critical design constraint, and two-shot production is the preferred method at volume.
Insert molding is the right choice when the goal is embedding metal strength, electrical conductivity, or pre-made functional components into a plastic part. The mechanical bond between plastic and insert surface geometry is reliable and well-understood — less dependency on material chemistry.
When a part needs both — a structurally reinforced core and a soft user-facing surface — both processes can be used in sequence on the same part.
Fecision engineers review process selection at DFM stage as standard practice — before tooling decisions are committed. Our injection molding service includes both insert molding service and overmolding service. Upload your drawing at fecision.com/contact-us for a free DFM consultation.