Did you know that incorrect clamping pressure can lead to workpiece damage, tool wear, and even safety hazards in machining operations? The ideal clamping pressure is crucial for optimal performance.
To ensure both safety and precision, it’s essential to understand the correct pressure settings for your hydraulic chuck system. The recommended pressure settings typically range from 250-440 PSI (17-31 Bar), depending on the chuck diameter and bore size.
By understanding the factors that influence pressure requirements, you can adjust settings for different applications and optimize your machining operations. This comprehensive guide will help you determine the right clamping pressure for your specific machine setup.
Understanding Hydraulic Chuck Systems
To grasp the importance of clamping pressure, it’s essential to understand how hydraulic chuck systems work. Hydraulic chuck systems are designed to provide precise control over the clamping force applied to a workpiece.
Basic Components and Operation
A hydraulic chuck system consists of several key components, including a hydraulic cylinder, chuck body, master jaws, and top jaws. These elements work together to secure workpieces firmly in place.
How Clamping Force is Generated
The hydraulic mechanism uses fluid pressure to generate consistent clamping force throughout the clamp jaws. When hydraulic pressure is applied, the master jaws move simultaneously to center and secure the workpiece with equal force from all sides. This results in a firm grip on the tool or workpiece.
The clamping force is directly proportional to the hydraulic pressure applied to the system, allowing for precise control over the gripping force.
The Importance of Correct Hydraulic Chuck Clamping Pressure
The clamping pressure of your hydraulic chuck directly impacts the security and precision of your workpiece. Maintaining the correct pressure is essential for ensuring that your workpiece remains stable during machining operations.
Impact on Workholding Security
Correct hydraulic chuck clamping pressure is vital for workholding security. Insufficient pressure can lead to workpiece slippage, particularly during heavy cutting operations or at high RPMs. This can result in damage to your workpiece, tools, and even the machine itself.
Effect on Machining Precision
Proper clamping pressure also ensures consistent machining precision. By maintaining stable workholding throughout the cutting process, you can achieve better surface finishes and extend tool life. The right clamping pressure minimizes vibration and chatter, resulting in more accurate machining operations.
Optimal pressure settings help balance the competing needs of secure workholding and workpiece protection. Precision machining operations require careful pressure calibration to achieve tight tolerances consistently. As part complexity increases, the relationship between clamping pressure and machining accuracy becomes even more critical.
Recommended Pressure Ranges for Different Chuck Sizes
To achieve optimal clamping, it’s essential to understand the recommended pressure ranges for different chuck sizes. The correct hydraulic chuck clamping pressure is crucial for the security and precision of your machining operations.
Standard Pressure Settings for 5″-8″ Chucks
Smaller chucks, typically those between 5″-8″ in size, require pressure settings between 260-330 PSI (18-23 Bar). The specific bore diameter of your chuck can affect the optimal pressure setting. For instance, an 8″ chuck with a 2.5″ bore may require 260 PSI (18 Bar), while one with a 2″ bore might need 330 PSI (23 Bar).
Pressure Requirements for 10″-12″ Chucks
Medium-sized chucks, ranging from 10″-12″, generally need pressure settings between 250-400 PSI (17-28 Bar). Larger bore diameters typically require lower pressure settings within this range.
Large Chuck (15″-18″) Pressure Specifications
For larger chucks, between 15″-18″, the recommended pressure settings are between 300-440 PSI (21-31 Bar). Newer machines often require higher pressure settings within this range. For example, a 15″ chuck on a newer ST-30/35 machine built after 10/2019 might require 440 PSI (31 Bar).
You should always consult your machine’s documentation for the most accurate pressure recommendations for your specific chuck configuration.
Key Factors Affecting Hydraulic Chuck Clamping Pressure
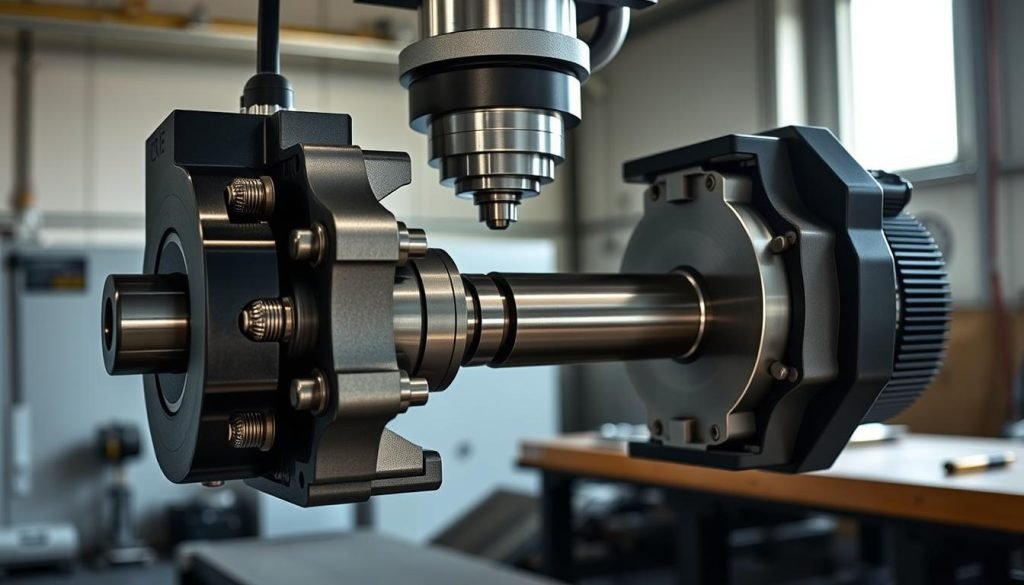
Understanding the factors that impact hydraulic chuck clamping pressure is essential for optimal performance. The clamping pressure is not a one-size-fits-all setting; it varies based on several key factors.
Chuck Size and Bore Diameter
The size of your chuck and its bore diameter play a significant role in determining the appropriate clamping pressure. Larger chucks may require different pressure settings.
Workpiece Material Properties
Workpiece material properties significantly impact pressure requirements. Softer materials like aluminum may require lower pressure, while harder materials need higher pressure.
Machine Age and Specifications
The age and specifications of your machine influence optimal pressure settings. Newer models often have different requirements than older ones.
Factors like hydraulic system condition, environmental conditions, and machine rigidity also affect clamping pressure. Understanding these allows for informed adjustments.
How RPM Influences Required Clamping Pressure
RPM plays a crucial role in determining the appropriate clamping pressure for your workpiece. As the rotational speed increases, the dynamics of the clamping process change significantly.
Centrifugal Force Effects at High Speeds
At higher RPM, centrifugal force causes the chuck jaws to experience an outward pull, reducing the effective clamping pressure on the workpiece. This effect becomes more pronounced at higher speeds, potentially compromising workholding security if not properly compensated for.
Calculating Pressure Adjustments for Different Speeds
To maintain workpiece security, you may need to increase your initial clamping pressure to counteract these centrifugal forces. The relationship between RPM and required pressure is not linear; small increases in speed can require significant pressure adjustments. Modern CNC machines may automatically adjust hydraulic pressure based on programmed spindle speeds, but it’s crucial to understand the underlying principles to optimize your machine’s performance.
For critical high-speed applications, consider using specialized chuck designs that minimize centrifugal effects. Always test pressure settings at gradually increasing speeds when setting up new operations to ensure workpiece security throughout the speed range.
Workpiece Considerations for Optimal Pressure Settings
The characteristics of your workpiece play a significant role in determining the optimal clamping pressure for your chuck. To achieve the best results, you must consider several factors that influence the required clamping force.
Thin-Walled and Delicate Parts
Thin-walled and delicate parts require carefully reduced clamping pressure to prevent deformation. Using specialized soft jaws or custom fixtures can help distribute the clamping force over a larger area, maintaining secure holding without damage.
Workpiece Engagement Depth
The depth of workpiece engagement into the chuck jaws significantly impacts the required pressure. Deeper engagement generally allows for lower pressure settings, as it provides more secure holding.
Extension Beyond Chuck Jaws
Workpieces that extend far beyond the chuck jaws create leverage that can overcome clamping force, requiring higher pressure settings to maintain secure holding.
When determining the appropriate pressure, consider the cutting forces that will be applied and the surface finish requirements of your workpiece. For workpieces with varying diameters, set pressure based on the smallest diameter in contact with the chuck jaws.
Jaw Configuration and Its Impact on Pressure Requirements
The configuration of your chuck jaws plays a crucial role in determining the optimal clamping pressure for your workpiece. The type of jaws you use can significantly affect the pressure needed to securely hold your part in place.
Standard Jaws vs. Pie Jaws
Standard jaws concentrate clamping force on smaller contact areas, whereas pie jaws distribute force over larger surfaces. This difference allows for lower pressure settings when using pie jaws, especially for delicate or thin-walled parts.
For instance, when machining thin-walled aluminum components, pie jaws can enable you to run chuck pressure lower than manufacturer recommendations, particularly when taking light cuts at speeds under 500 RPM.
Custom Jaw Solutions for Special Applications
Custom jaw solutions can be designed for specific applications to optimize the balance between holding security and workpiece protection. The material of your chuck jaws, whether hardened steel, aluminum, or soft jaws, affects the friction coefficient and required clamping pressure.
For recurring jobs that require specialized holding solutions, consider investing in application-specific jaw configurations. This can help you achieve the optimal clamping pressure for your workpiece.
Tool Pressure and Cutting Forces
The size of your rough cut affects the tool pressure, which in turn affects the required clamping pressure of your hydraulic chuck. When you perform machining operations, the forces generated by the cutting tool must be counteracted by sufficient clamping pressure to prevent workpiece movement.
How Cutting Depth Affects Required Clamping
The depth and width of your cuts directly influence the cutting forces that your chuck’s clamping pressure must resist. Heavier roughing operations generate greater cutting forces, necessitating higher clamping pressures.
Balancing Cut Size with Chuck Pressure
For heavy roughing operations, consider increasing clamping pressure beyond what’s used for finishing operations on the same part. Conversely, finishing operations with light cuts may allow for reduced clamping pressure, minimizing workpiece distortion risk.
Factors such as tool geometry, cutting direction relative to jaw positions, and modern machining strategies also impact required clamping pressure. Always consider the maximum cutting force encountered during the operation when setting initial clamping pressure.
Signs of Incorrect Hydraulic Chuck Clamping Pressure
Identifying signs of incorrect hydraulic chuck clamping pressure is essential for preventing machining errors. When your clamping pressure is not set correctly, it can lead to various issues that affect the quality of your machined parts.
Symptoms of Excessive Pressure
Excessive clamping pressure often manifests as visible deformation of workpieces, particularly with thin-walled components. Parts may also show jaw marks or indentations, indicating that the clamping force is too high.
Indicators of Insufficient Pressure
Insufficient pressure typically results in workpiece slippage, visible tool marks where the part has shifted, or complete ejection in extreme cases. Tool breakage or accelerated tool wear can also signal insufficient workholding pressure.
Workpiece Movement and Chatter
Workpiece movement and chatter produce distinctive sounds and surface finish issues that experienced machinists can quickly identify. Unusual vibration patterns during machining operations often indicate improper clamping pressure.
Monitoring these signs allows for real-time pressure adjustments before significant quality issues develop. By being aware of these indicators, you can ensure that your hydraulic chuck clamping pressure is always within the optimal range.
Consequences of Using Wrong Pressure Settings
Incorrect clamping pressure is a critical issue that can affect the efficiency and safety of your machining operations. When you use the wrong pressure settings in your hydraulic chuck system, it can lead to a range of negative outcomes.
Workpiece Damage and Deformation
One of the most immediate consequences of incorrect pressure settings is workpiece damage. This can include deformation, surface marring, and dimensional inaccuracies, all of which can lead to costly rework or scrapped parts.
Tool Life Reduction
Insufficient clamping pressure can dramatically reduce tool life by creating conditions that increase vibration and inconsistent cutting conditions. This not only affects the quality of your workpiece but also increases your operational costs.
Safety Hazards and Machine Damage
Workpieces that come loose during operation present serious safety hazards to operators and can cause catastrophic machine damage. Moreover, excessive pressure can prematurely wear chuck components, including seals, cylinders, and jaw mechanisms.
Establishing proper pressure protocols is essential for both operational efficiency and workplace safety. By understanding the consequences of incorrect pressure settings, you can take steps to ensure that your hydraulic chuck clamping pressure is set correctly, thereby protecting your workpieces, tools, and machines.
Step-by-Step Guide to Determining the Right Pressure
To achieve the best results in your machining operations, it’s essential to determine the right clamping pressure for your hydraulic chuck. This process involves several key steps that help ensure optimal workholding security and precision.
Assessing Your Specific Application
Begin by assessing your specific application. Consider factors such as workpiece material, dimensions, cutting forces, and required surface finish. These elements will influence the clamping pressure needed for your operation.
Consulting Manufacturer Recommendations
Always consult your chuck manufacturer’s recommendations as the primary starting point for pressure settings. These guidelines provide maximum pressure ranges for different chuck sizes and types, serving as a valuable reference for your initial settings.
Testing and Fine-Tuning Procedures
For standard operations, start with the manufacturer’s recommended pressure and adjust based on your specific requirements. Test initial pressure settings with conservative cutting parameters before proceeding to full production. Implement a methodical fine-tuning process, making small pressure adjustments and documenting the results.
By following these steps, you can determine the optimal clamping pressure for your hydraulic chuck, ensuring secure workholding and precise machining.
How to Adjust Hydraulic Chuck Pressure Correctly
To ensure optimal performance, you need to know how to adjust hydraulic chuck pressure correctly on your lathe. Adjusting the pressure involves several key steps that must be followed carefully to achieve the desired results.
Locating and Using Adjustment Knobs
First, locate the pressure adjustment knobs on your lathe. Typically, there are separate controls for the primary chuck and tailstock or secondary chuck. To adjust the pressure, turn the adjustment knob clockwise to increase pressure or counterclockwise to decrease it.
Primary Chuck vs. Tailstock Adjustments
It’s essential to understand that the primary chuck and tailstock may have different pressure requirements. The tailstock pressure is often set higher than the chuck pressure, typically around 400 PSI.
Verifying Pressure Changes
After making adjustments, verify the actual pressure reading on the machine’s pressure gauge. Allow the system to stabilize briefly before taking readings, and document all changes for future reference.
Safety Considerations for Hydraulic Pressure Systems
Ensuring the safe operation of your hydraulic pressure system is crucial for maintaining optimal performance and preventing potential hazards. When working with hydraulic chucks on your lathe or other machines, it’s essential to be aware of the safety considerations to avoid accidents and equipment damage.
Never Exceeding Maximum Recommended Pressure
Never exceed the maximum recommended pressure for your specific chuck and machine configuration. Exceeding this limit can lead to equipment failure and safety hazards. Always refer to the manufacturer’s guidelines for the correct pressure settings.
Regular System Inspection
Implement a regular inspection schedule for your hydraulic system. Check for leaks, worn seals, and ensure proper gauge function. Maintaining your hydraulic system regularly will help prevent unexpected failures.
Emergency Procedures
Ensure all operators understand emergency procedures for hydraulic system failures, including emergency stop protocols. Training personnel on the proper adjustment and monitoring of hydraulic pressure systems is also crucial.
By following these safety considerations, you can significantly reduce the risk of accidents and ensure the longevity of your equipment. Regular maintenance and proper training are key to safe and efficient operation.
Conclusion: Achieving Optimal Performance Through Proper Pressure Management
Achieving optimal performance in your lathe machine operations requires precise hydraulic chuck clamping pressure management. By understanding the factors that influence pressure requirements, you can make informed decisions for each specific application, ensuring optimal machining performance, workpiece quality, and operational safety.
Regular monitoring and adjustment of pressure settings based on changing conditions ensures consistent results throughout production runs. Investing time in determining the right pressure settings pays dividends through improved part quality, extended tool life, and reduced scrap rates. Creating standardized pressure setting procedures helps ensure consistency across different operators and shifts.
By applying the principles outlined in this guide, you’ll be well-equipped to determine and maintain the right hydraulic chuck clamping pressure for all your machining operations, extending the life of both your workholding equipment and your machine tool.

