Injection molding is a common process used to turn raw plastic into finished products in the plastic industry. Small pins called ejector pins push the hardened plastic parts out of the mold during this process. Sometimes, these pins leave marks on the finished pieces. This can happen for different reasons and can lower the quality of the final product.
Ejector pins are long and retractable rods. These help to remove the solid plastic from the mold after it cools down. The pins slide back into place so the mold is ready for the next cycle once they push the part out.
What Are Ejector Pin Marks in Injection Molding?
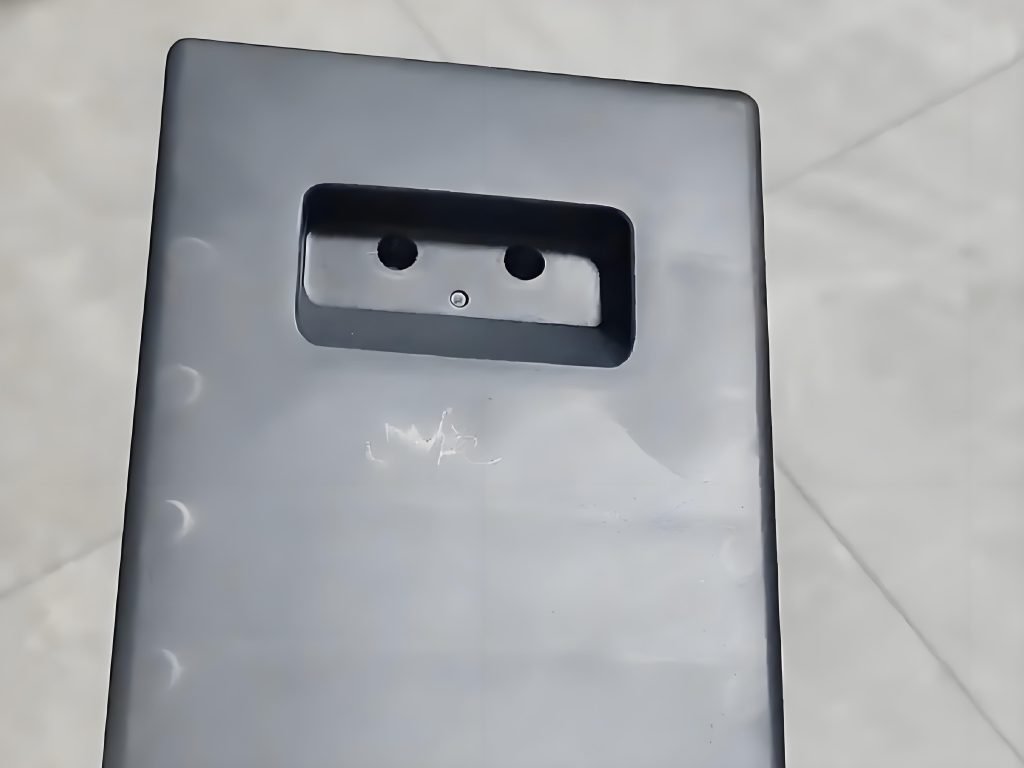
Ejector pin marks in injection molding are small imprints or blemishes. These are usually oval, round, or elongated that appear on the surface of molded parts during the injection molding process. These marks are made by ejector pins that push the finished part out of the mold after it opens.
While ejector marks mainly affect how the part looks and are generally not harmful, they can be a problem if they are in important areas. These important areas usually include sealing surfaces or spots that experience a lot of stress.
The marks can interfere with how the part works in these cases. These may cause issues when putting parts together or when they move. They can also weaken the overall strength of parts.
How Does Ejector Pin Marks Impact the Product Quality?
Ejector pin marks mainly affect two things. These include how the product looks and how well it works.
- Appearance
These marks can make the surface uneven and show white spots or blemishes. This can make the product look less attractive.
- Performance
Sometimes, ejector marks can damage the inside of the part, making it weaker and less durable. If the marks are bad enough, they can cause cracks, bending, or other problems during use. It shortens the life of product.
While these marks usually are not a serious problem, customers don’t like to see them on parts that show on the outside. Sometimes manufacturers and customers agree to accept them if they meet certain sample or inspection rules. This is especially true for parts that are not visible.
Common Causes of Ejector Pin Marks
There are multiple causes of ejector pin marks. Let’s learn what caused ejector pin marks here:
- Improper Placement of Ejector Pin
If ejector pins are placed on weak spots of the part, they can cause the part to bend or deform. This is especially when pushing it out. Even though many pins work together to share the force, thin or soft areas are more likely to get misshaped during ejection.
- Ejection Before the Completion of Cooling
If the part is pushed out before it has fully cooled and hardened, it can bend or lose its shape. This is especially true in thicker sections.
- Uncooled Ejector Pin
When ejector pins don’t have cooling water and are not made or fitted precisely, they don’t cool properly. This temperature difference between the pins and the mold can cause marks on the part.
- Not Holding Optimum Pressure
If the pressure is too high, it can push the ejector pins down or even bend them. High injection pressure also makes the part stick more to the mold. So, it takes more force to push it out.
- Insufficient Wall Thickness
If the walls of a part are very thin, it can cause problems. It is usually less than 2.5mm for simple shapes or less than 2.8mm for more complex ones.
- Presence Of Bosses, Ribs, And Complex Geometries
Parts with ribs, bosses, or other complex details need more force to push them out of the mold. This extra force can make ejector pin marks defect more likely to happen.
- Improper Size of Ejection Pin
If ejector pins are too big or not in the right spots, this can cause a problem. They can put too much pressure on the part when pushing it out. This can cause dents or scratches on the surface.
- Inadequate Venting
If the mold doesn’t have good venting, a vacuum can form inside. This makes it harder to release the part and increases the chance of ejector pin marks.
- Improper Temperature
When the mold is too warm, the plastic can stick to it. This is making it tougher to eject the part cleanly without marks.
Prevention Techniques for Ejector Pin Marks

Here are key prevention techniques for ejector pin marks to know:
Proper Design of Ejector Pin
Using the right size pins helps spread out the pushing force evenly across the part. This stops pressure from building up in one spot which can cause marks.
Pins with rounded or tapered tips are gentler on the part’s surface. These reduce the chance of sharp dents or scratches when pushing the part out.
Avoid putting pins on thin walls, curved areas, or near the gates where plastic flows in. Spread the pins out evenly instead of grouping them together. This helps keep the force balanced and lowers the chance of marks.
As a result, you can protect your parts from damage and get cleaner, better-looking results.
Optimization of Mold Design
Give the part a slight slope to help it slide out of the mold more easily. This also helps stop a vacuum from forming that can make ejection harder. Make sure the mold has proper vents so air can escape. This prevents a vacuum from getting trapped inside which makes it easier to remove the part.
Adjusting Adequate Processing Parameters
You can improve the quality of the parts and reduce the risk of defects by making the following adjustments:
- Reduce the pressure and speed when injecting the plastic to help lessen internal stress in the part.
- Use less melted plastic when filling the mold to avoid overfilling.
- Set the mold and barrel temperatures just right for even cooling of the part.
- Allow more time for the part to cool down gradually and evenly.
- Slow down the speed when pushing the part out to lessen the impact and reduce the chance of damage.
Improved Part Designs
Make walls thicker, especially where ejector pins push the part. Include ribs or bosses in areas that need extra strength during ejection.
Proper Surface and Material Treatment
These changes help protect the part during ejection and make it easier to get good and clean results.
- Pick plastics that flow well and have natural lubrication.
- Use mold release agents the right way and spread them evenly.
- Polish the mold surface smoothly in the direction the part comes out.
- Try heat or quick-cure coatings on the mold to help the part release easier.
Fecision: A Reliable Partner for Quality Plastic Molding!
Making injection molded parts is a tricky process that takes skill and experience to do well. With Fecision’s engineering team, you can count on consistent and high-quality results every time. We quickly provide a quote and do a detailed design check before you place your order. We are here to help make your injection molding process smooth and successful.