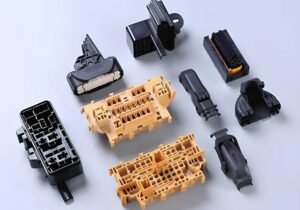
Dirty or neglected molds are one of the most common causes of production, delays, part rejection, and tool wear. The best solution for it is to clean injection molds regularly before it becomes a bigger problem.
But how often should injection molds be cleaned, and what’s the safest way to do it without causing damage?
If you’ve ever asked yourself that question, this guide is for you. In the sections below, we’ll walk through the right way to clean injection molds to extend the mold life, improve output quality, and reduce unscheduled downtime.
Understanding the Types of Injection Mold Contamination
Here are some types of contamination you should be aware of or else they can reduce the lifespan of expensive mold tooling.
1. Residue Buildup
Residue buildup is one of the most common forms of contamination in plastic injection molds. It’s typically caused by leftover materials such as degraded resins, additives, mold release agents, or colorants.
If not cleared regularly, residue buildup can also restrict airflow or cause improper mold filing. Over time, this buildup becomes harder to remove and can damage mold surfaces if aggressive cleaning methods are used.
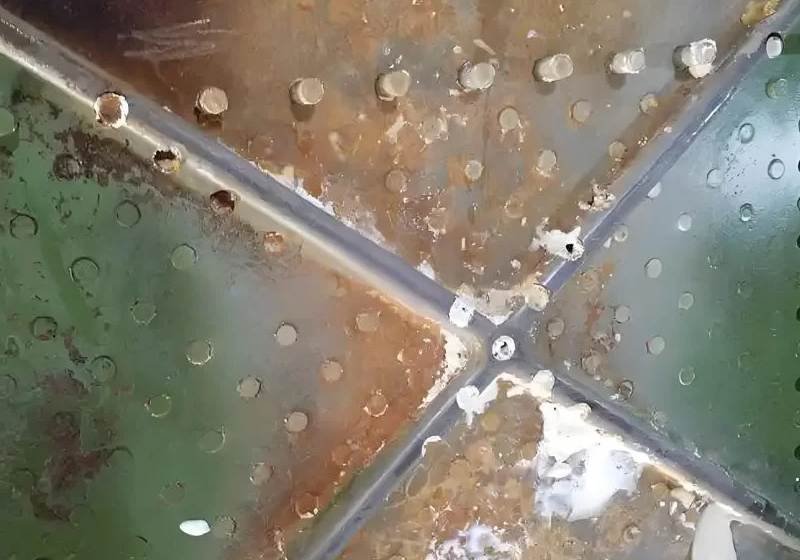
2. Rust, Corrosion, and Moisture
Molds are often made from steel or other metals that are prone to corrosion when exposed to moisture. Improper storage, lack of protective coatings, or water in cooling channels can lead to rust formation.
Acidic gases released during molding certain materials, such as PVC, can also cause corrosion. If left untreated, even small amounts of rust can spread, weakening the mold and increasing the risk of failure.
3. Microcracks and Wear Signs
Microcracks, scratches, and wear marks may not seem like contamination at first, but they can trap dirt, resin, and moisture. These defects often develop from repeated use, improper handling, or abrasive materials passing through the mold.
As time passes, wear in high-friction areas can affect mold alignment, part tolerance, and sealing performance. Cleaning alone won’t fix this kind of damage, but identifying it early can prevent contamination.
When Should You Clean Injection Molds
Here are two of the most important triggers that indicate you should clean injection molds:
1. Visual Signs
If residue, discoloration, or rust is spotted on the mold surface, it’s a strong sign that cleaning is mandatory. You may also notice defects in the molded parts, such as:
- Flow lines or streaks
- Burn marks
- Short shots (incomplete fills)
- Surface blemishes or imprints
2. After Every Production Cycle
Cleaning after each cycle helps maintain color consistency. It also prevents material cross-contamination and reduces buildup that’s harder to remove later.
A quick wipe-down with the right solvent and inspection of key areas can go a long way in preventing bigger problems.
Methods for Cleaning Injection Molds
Below are four effective and commonly used cleaning methods, each with its own advantages and best-use scenarios:
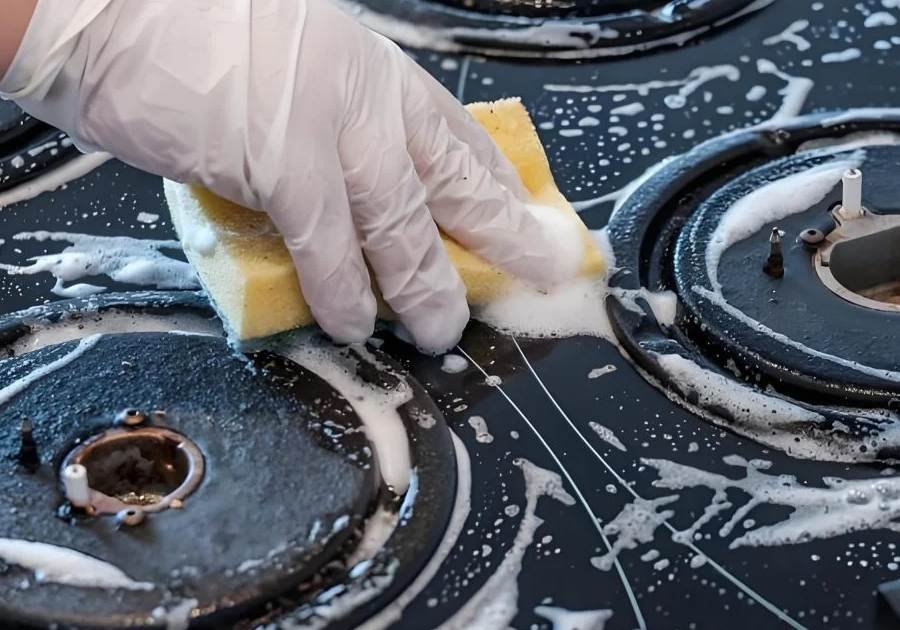
1. Manual Cleaning
Manual cleaning is the most basic and widely used method, especially for minor residue or surface-level dirt. It involves using soft brushes, lint-free cloths, and approved solvents or degreasers to wipe down the mold surfaces.
This method is ideal for small shops or quickly cleaning between runs. It allows for close inspection of wear or damage and is helpful in reaching specific areas like ejector pin holes or vents.
2. Ultrasonic Cleaning
Ultrasonic cleaning uses high-frequency sound waves in a liquid bath to remove dirt and contaminants from the mold. When the mold is submerged, microscopic bubbles created by the sound waves reach into fine details, dislodging even stubborn residues.
This method is ideal and highly effective for molds with complex geometries or tight cavities that are difficult to clean manually. It’s gentle on surfaces and doesn’t require abrasive tools, which makes it perfect for precision molds.
3. Dry Ice Blasting
Dry ice blasting is a non-abrasive, eco-friendly method that uses compressed air to shoot dry ice pellets at the mold surface. As the pellets hit the surface, they cause contaminants to shrink and break away without damaging the mold.
Most industries use this method for removing resin, grease, or mold release agent buildup without leaving any residue. Since dry ice sublimates into gas, there’s no cleanup required afterward.
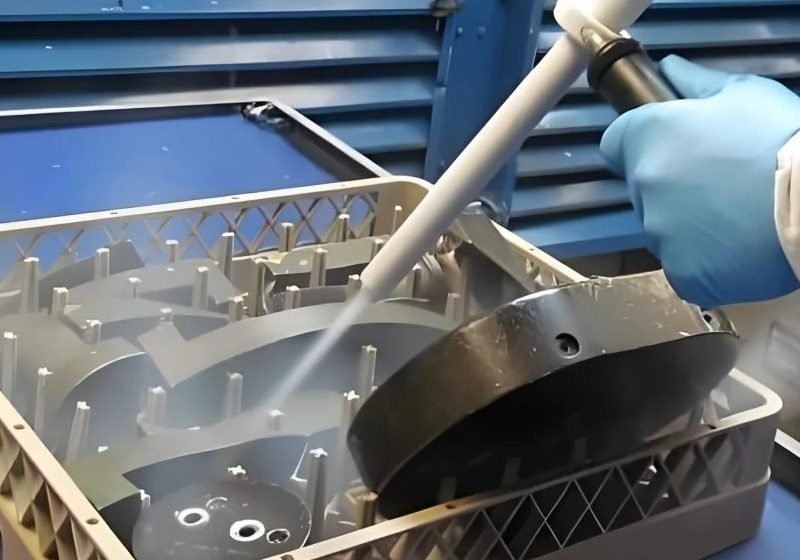
4. Chemical Mold Cleaners
Chemical mold cleaners are specially formulated liquids or sprays designed to dissolve residues like rust, carbon deposits, or degraded plastics. They come in solvent-based, water-based, or foam formats and are chosen based on the type of contamination.
These cleaners are useful for deep cleaning without aggressive scrubbing. They can be applied directly to mold surfaces or used in soak tanks.
Step-by-Step Process: Manual Mold Cleaning
As mentioned before, manual mold cleaning remains one of the most effective ways to maintain injection molds. Here’s a step-by-step guide to perform manual cleaning the right way.
1. Safe Disassembly
Before beginning any cleaning process, ensure the mold is fully shut down, cooled, and removed safely from the injection molding machine.
Disconnect all power, air, and water lines. Carefully disassemble the mold following the manufacturer’s guidelines to avoid damaging pins or anything else.
2. Cleaning Parts
Once disassembled, use lint-free cloths, soft brushes, and approved mold cleaners or solvents to remove any visible residue. Focus on high-contact areas such as cavities, cores, parting lines, vents, and ejector pin holes.
Avoid using metal brushes or abrasive pads that could scratch the mold surface. For hardened residue or carbon buildup, apply a foam or liquid mold cleaner and allow it to sit for the recommended time before gently wiping it off.
3. Inspecting Wear
After cleaning, take time to carefully inspect the mold for signs of damage or wear. Also, look for pitting, microcracks, erosion, or any distortion in key areas like the cavity, runners, or gate system.
Check the condition of ejector pins, guide pins, and seals. Document any irregularities found and determine if any parts need repair or replacement.
4. Lubrication and Reassembly
Once all parts are clean and dry, apply a thin, even layer of mold-safe lubricant to moving components such as ejector pins, slides, and bushings.
This reduces friction and wear during operation. In the end, reassemble the mold carefully, making sure all components are aligned correctly.
Injection Mold Maintenance Tips to Keep Molds Cleaner Longer
With the below mentioned plastic injection molds maintenance tips, you can minimize contamination and wear:
- Properly Store the Injection Molds: Store the molds in a dry, temperature-controlled environment to prevent moisture buildup.
- Use Rust Prevention Sprays: Apply a mold-safe rust prevention spray before storing to protect surfaces from corrosion.
- Utilize Purge Compounds: Use purge compounds between runs to flush out leftover materials and prevent internal buildup.
Build Better Injection Molds with Fecision
Clean, high-quality molding starts with precision-made tools. If molds are poorly designed or manufactured, no amount of cleaning will fix the root problems. That’s why having the right tooling from the start is key.
At Fecision, we understand that. Our services include Mold Tooling, CNC Machining, and Full-Service Molding for every type of requirement. When molds are engineered and machined correctly, it becomes much easier for operators to clean injection molds during routine production.
Contact us now and get started with better molds.